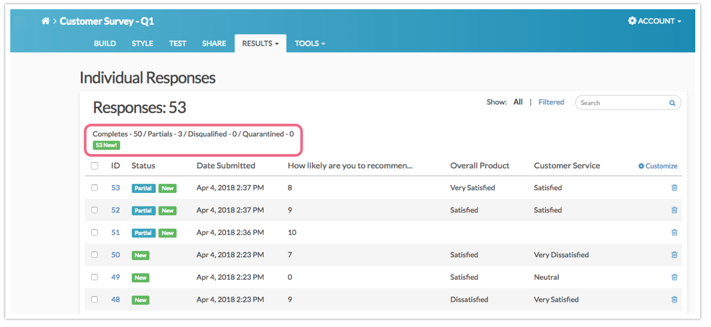
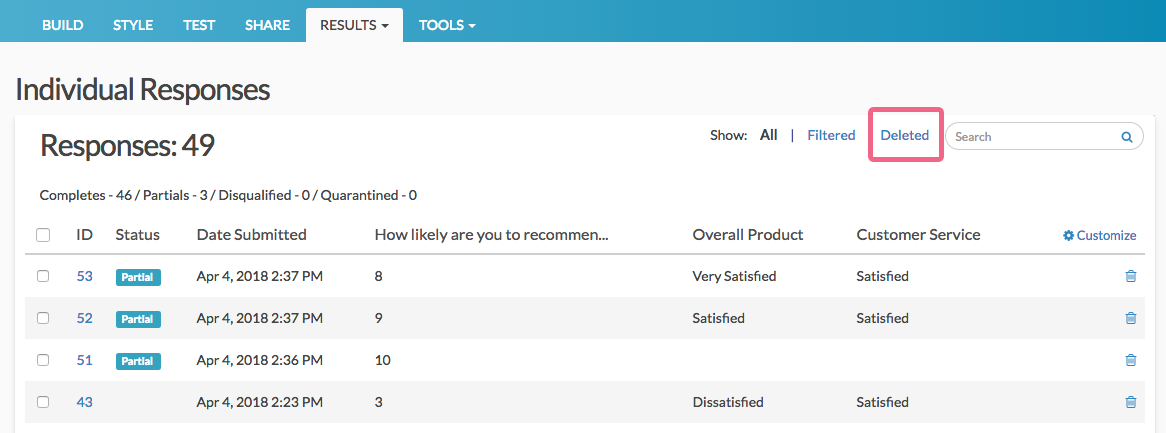
Under Results > Individual Responses you can review each of your individual survey responses.
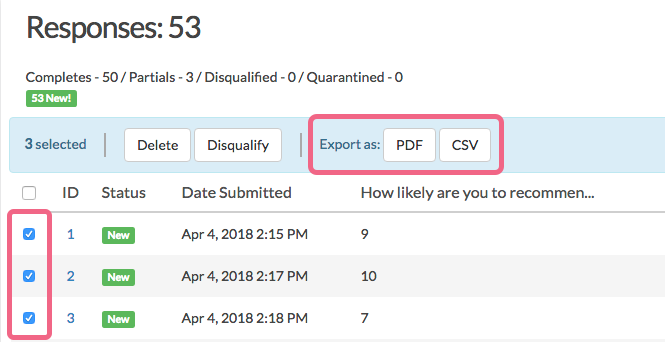
At the top, you will have an overview of how many complete, partial, and disqualified responses have been collected. If you are using the data cleaning tool to quarantine responses you have a count of quarantined responses. Finally, you will also have a count of how many new responses have been collected since you last logged in.
Filter and Search for Responses
Below the overview, you will find the list of responses. You can filter your list of responses by the following Response Status (as well as Response Tags):
- Real (non-test)
- Quarantined
- Test
- Completed
- Partial
- Disqualified
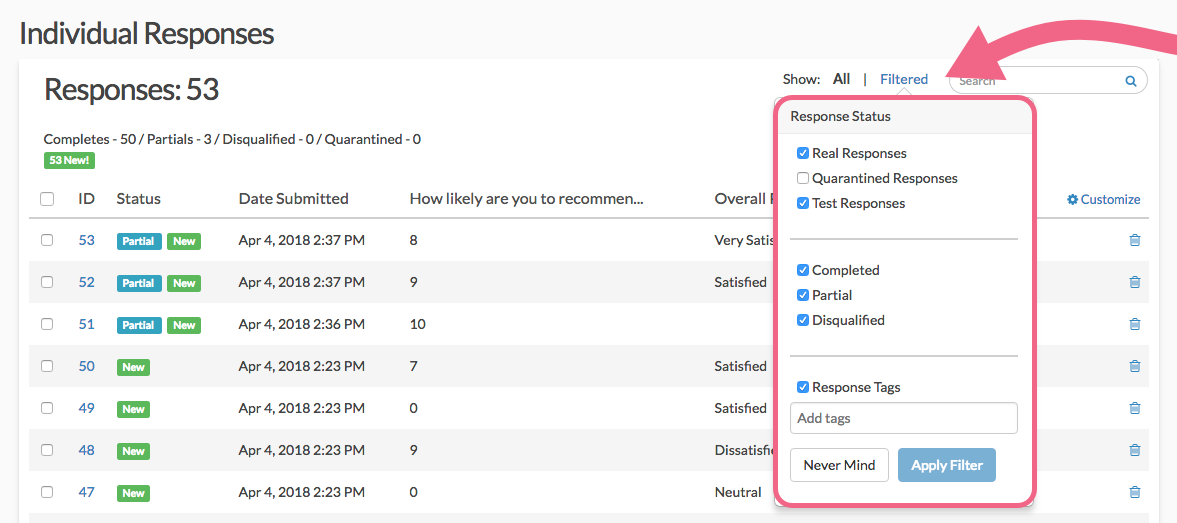
Apply a Filter
- Click the Filtered link at the top of your response list.
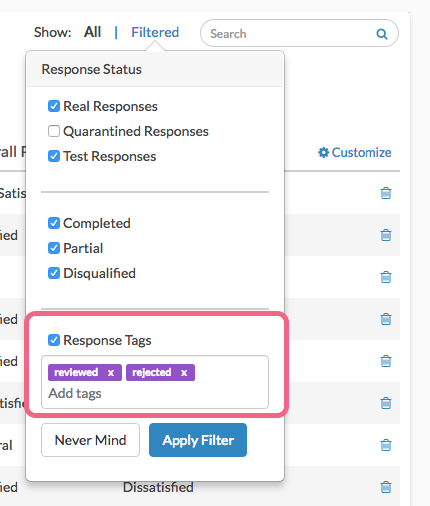
- Check the boxes associated with the Response Stats and/or Response Tags (If filtering on response tags, type the tag name into the provided field and hit enter. Add more tags in the same manner, if needed).
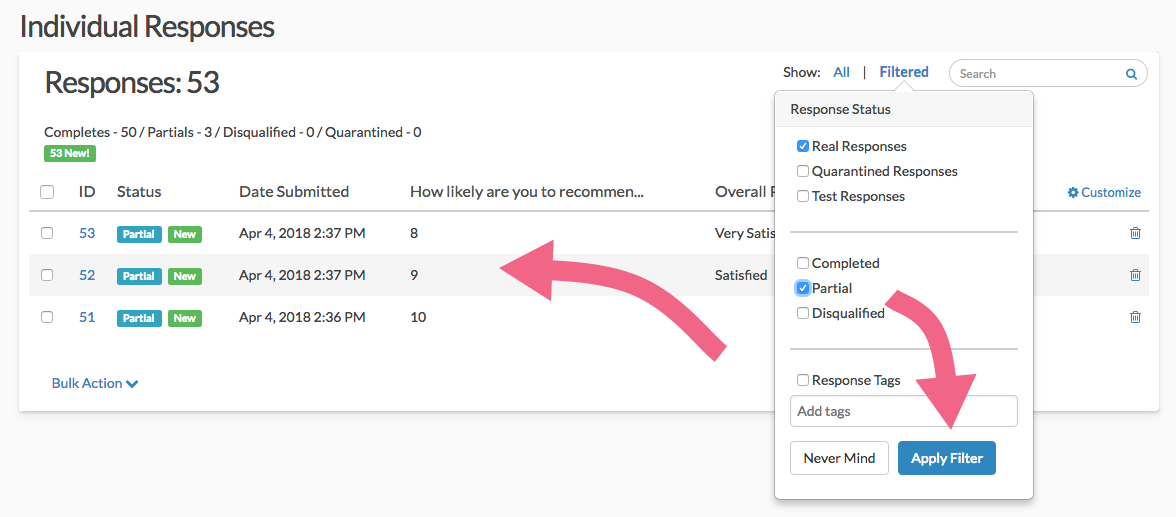
- Click Apply Filter to view only the individual responses that match the filter criteria. Please note that if your response list does not return any responses after filtering, this means that no responses match your filter. Review your filter and re-apply. For example, you may want to view only the Partial responses.


Search for Individual Responses
You can also search for responses by ID or those containing certain data or tags using the Search box. To search for a specific ID, type in the # followed by the ID number that you are searching for, ex. #49.
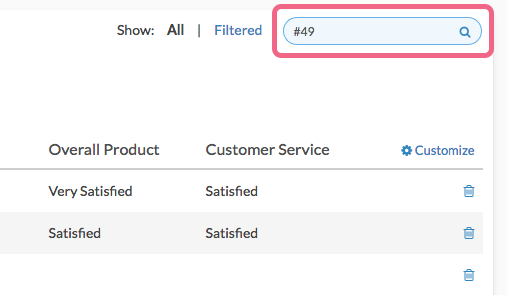
Customize the Response Grid
Click the Customize link to customize which questions you want to see displayed in this list (as columns). You can add up to 5 items to your list of responses.

Review Responses
To view a response, click anywhere on the associated row. You can navigate between responses using the arrows at the bottom of the panel.
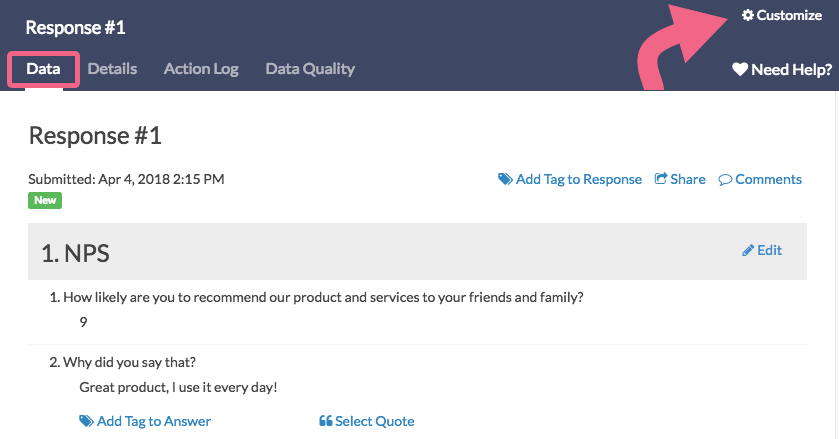
- The respondent's answers will be on the Data tab.
- Click the Customize link in the upper right to select which questions to display on the Data tab. These customizations will carry over to all responses as you page through them. You can select up to 50 questions at a time in this view.
- Go to the Details tab for system information such as Date Submitted, Time Started, Last Update, IP Address, Language, User Agent, Edit Link, Session ID, Geodata, Page Path, and Email Invite Data.
- The Action Log tab lets you see which actions fired and, if needed, allow you to re-fire an action. This is very useful for Send Email actions or the Google Spreadsheet integration.
- Finally, on the Data Quality tab, you have details about the quality of the response. For more information about the data here check out our Data Cleaning Tool documentation.

Edit Responses
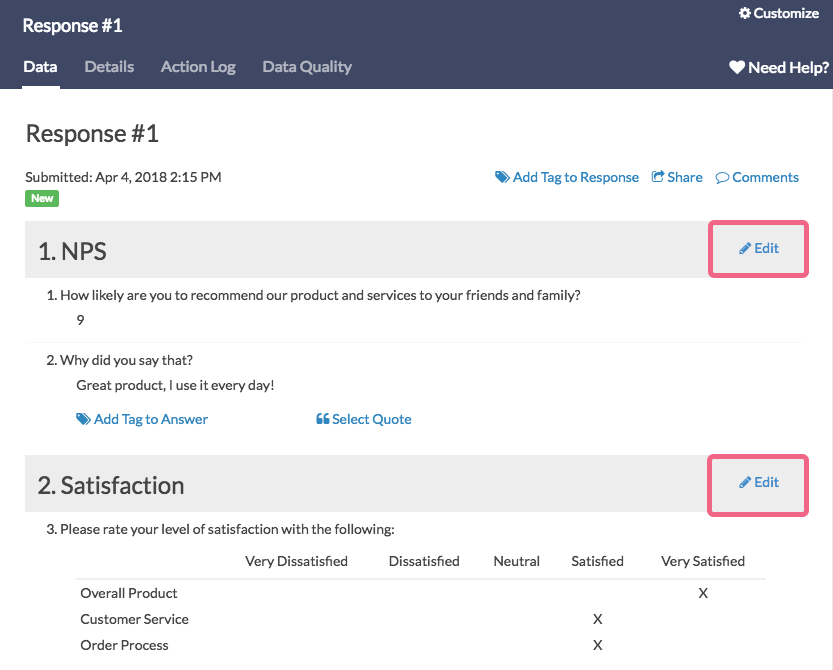
When viewing an individual response, on the Data tab, you will have an Edit link in the top right corner of each page. Click this to make changes to an individual response.
For information about allowing survey respondents to edit their own responses, check out the Allow a Respondent to Edit Their Response Tutorial.
Overall Response Tags and Comments
You can add comments for each response for internal use.
- To do so click the Comments link in the upper right, when viewing the response.
- Add your comment text to the Comments field that appears.
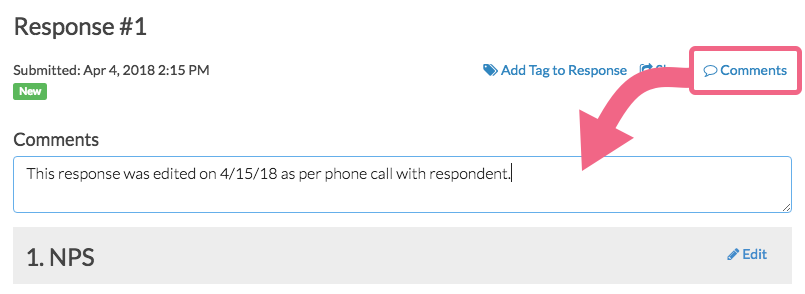
- Click Done in the bottom right when you are finished. These comments can be included in CSV/Excel Exports of your raw data.

Add Tag to Response
You can also add a tag responses which can then be used to find specific responses using the Search field.
- When viewing an individual response, click Add Tag to Response.
- Enter your tag text in the Tags field. These should be short, concise codes that you use to quickly find like responses.


Tag and Quote Open-Text Responses
Open-text questions can be tagged and those tags will appear as 'buckets' in our Open Text Analysis tool.
Add Tag to Answer
To tag an answer to an open-ended question such as a Texbox or Essay, follow these steps.
- Click on an Individual Response to view it.
- Locate an open-ended question and the associated answer. If a question/answer is compatible with tagging, you will see a Add Tag to Answer link. Click this link to add your tag.
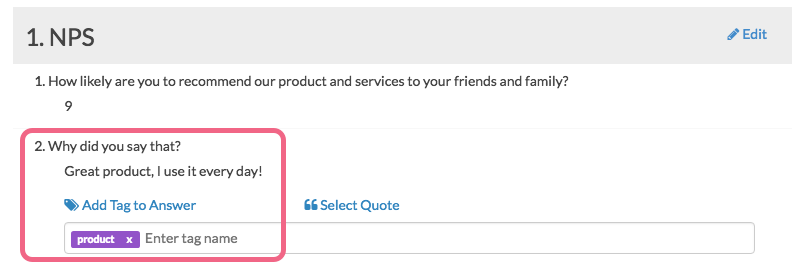
- Type the tag text and click Enter to add the tag. Multiple tags can be added in this manner.

Remember, tagged answers create buckets inside the Open Text Analysis Tool. These buckets can then be reported on in a Standard Report.
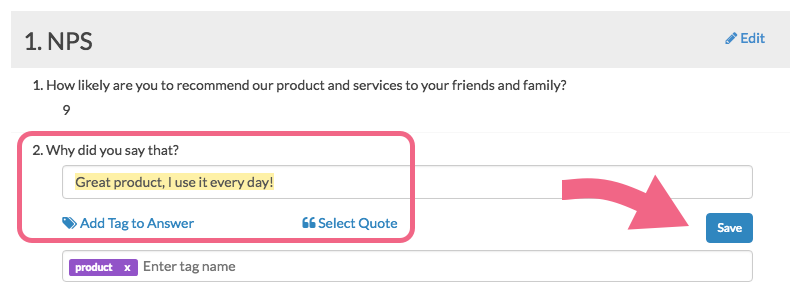
Select a Quote from Open-Ended Answer
Answers to open text questions such as Texboxes and Essays can also be quoted.
- Open an individual response and locate an open-ended question/answer.
- If a question/answer is compatible to be quoted, you will see a Select Quote link. Click this link to enter quote mode.
- By default, the entire piece of text will be highlighted. Highlight the portion of text you want to quote in a Standard Report and click Select Quote followed by the Save button.
- You can add a Quotes Element to the Standard Report which will display all text you've highlighted as quotes with links to the original response.

Download and Print Responses
- When viewing an individual response, click Download in the lower left to download a PDF file of that response. You will have number of PDF Settings to choose from:
- Include Details (Browser, Page Path, Session ID)
- Include Geo Data
- Include Internal Comments
- Include Sentiment Scores
- Exclude Questions Hidden From the Respondent - If a respondent did not see a question, perhaps due to Question Logic, enabling this setting will not include those questions in the PDF download.
- Use Customized View
- Include text/instruction from survey - this will include content that has been added to the survey via Text / Instruction Elements.
- Change PDF orientation to landscape - this can be useful if your survey contains large grid questions.
- Click Download PDF to generate a PDF document of the specific response.
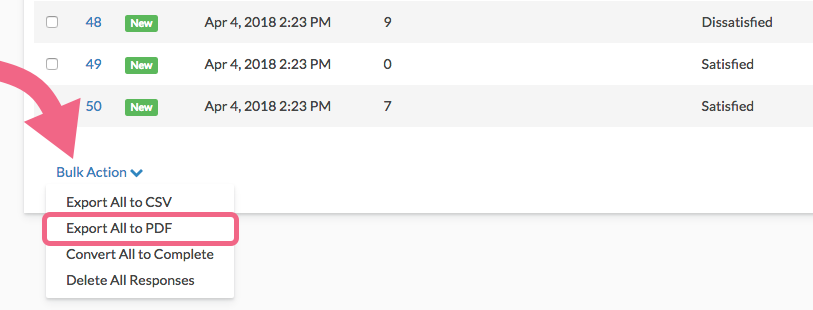
Export Multiple Responses to PDF
If you want to export multiple responses as PDF (or CSV/Excel), close out of the individual response. There are a couple of options.
- At the bottom of the response list you can select to Export All to PDF via the Bulk Action link.
- If you want to export more than one, but not all responses, select the responses that you want to export by checking the associated checkbox. A bulk action toolbar will appear where you can click to Export as: PDF.


With your PDFs downloaded, you can then print responses as needed!
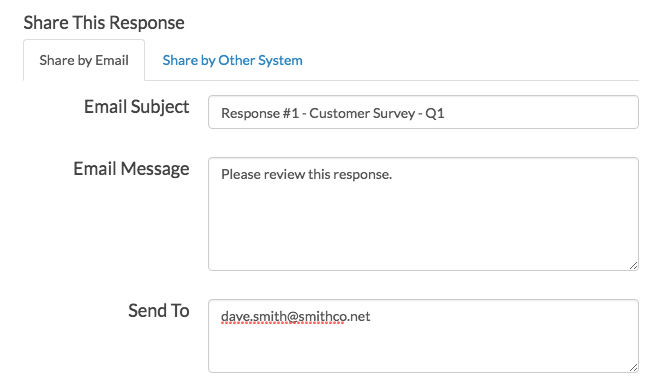
Share Individual Responses
When viewing an individual response, you can use the Share link in the top right to share your Individual responses via email or grab a unique URL to share via another system.
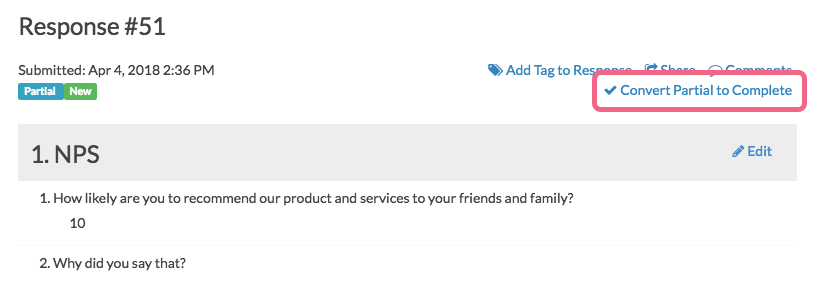
Convert Responses
On the Data tab of an individual response, you will have the option to convert the response to Complete. This will be available Partial responses.
Convert Multiple Partial/Disqualified Responses to Complete
- To convert multiple Partial or Disqualified responses at once, select the responses on the Responses tab. A bulk action toolbar will appear.
- Click Mark Completed to convert the selected responses to Complete.
- You also have the option to convert all non-Complete responses to Complete. To do so, locate the Bulk Action link at the bottom of your response list. Click the link and select Convert All to Complete and all non-complete responses will be converted. There is no undo button so make sure you need to do this before you proceed!
Convert Multiple Test Responses to Real Responses
- To convert multiple Test responses at once, select the responses on the Responses tab. You will see a bulk action toolbar appear at the top of the list.
- Click Mark Selected Test Responses As Real.
- To bulk convert all Test responses to Real responses, locate the Bulk Action link at the bottom of your response list. Click the link and select Mark All Test Responses As Real.
Convert Complete Response to Disqualified
- To convert a response from Complete to Disqualified, select the responses on the Response tab. You will see a bulk action toolbar appear at the top of the list.
- Click the Disqualify button to confirm the action.
- To convert a response that was marked as Disqualified, you can access the Edit Link for that response and resubmit the response with a different answer to the question that prompted the disqualification.
Delete Responses
When you delete a response from the Individual Responses tab, the response is placed in the Deleted view (similar to your computer's trash bin). You then have the option to Permanently Delete the response from the Deleted view.
Once permanently deleted, responses cannot be recovered.
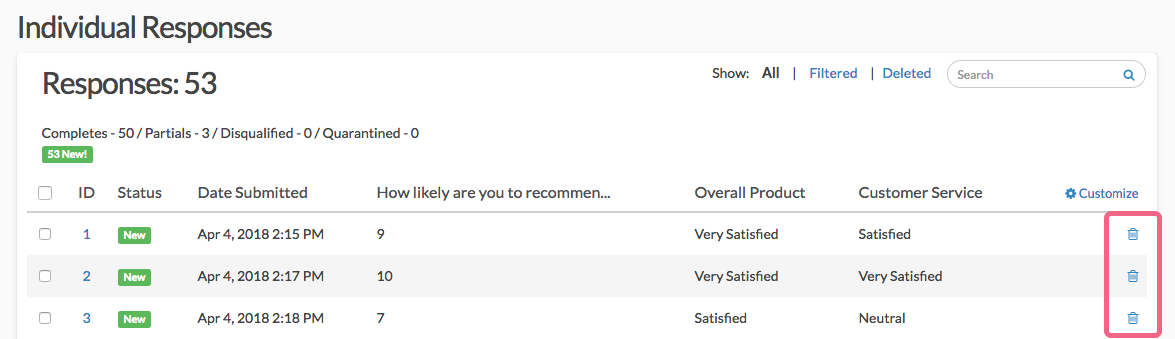
Delete Responses One-By-One
Delete responses one-by-one by selecting the trash bin icon on the far right in the response list. Each response will be moved into the Deleted view where it can later be permanently deleted.
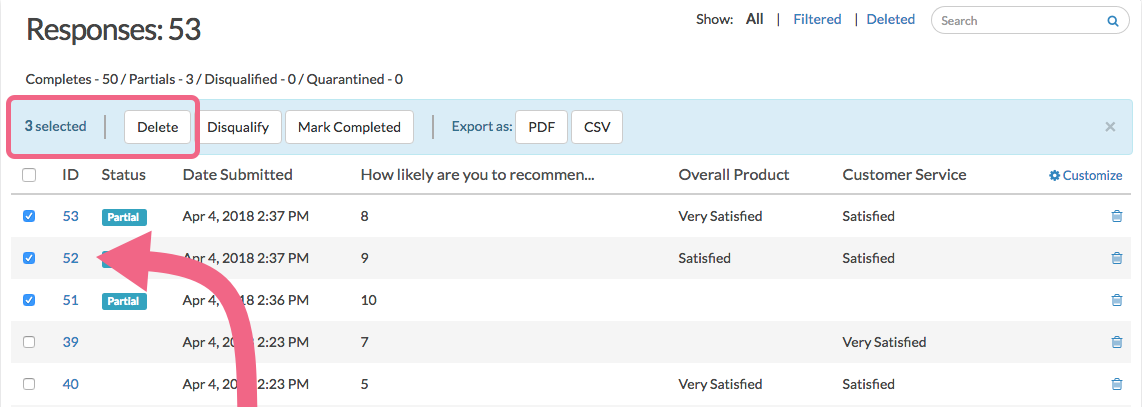
Delete Multiple Responses
- Select multiple responses to delete using the checkboxes to the left of each response. A bulk action menu will appear at the top of the response list.
- Click Delete to delete the selected responses. This will not permanently delete your responses. Deleted responses are moved to a Deleted view where they can be permanently deleted.

Delete All Responses
If you want to delete all individual responses for a given survey, you can do so!
- Via Results > Individual Responses, scroll to the bottom of the response list and click the Bulk Action link.
- Next, click Delete All Responses. This will not permanently delete your responses. Deleted responses are moved to a Deleted view where they can be permanently deleted.
Restore Deleted Responses
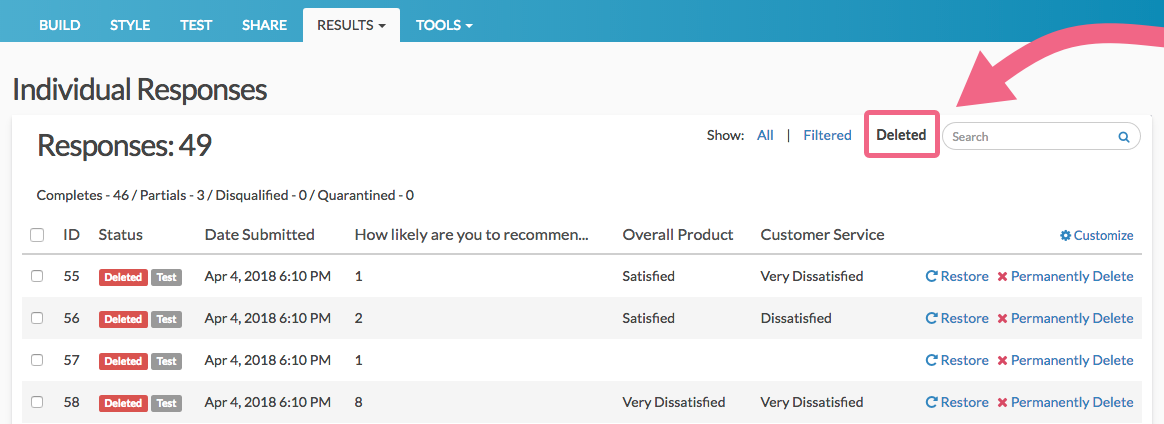
Deleted responses can be restored by clicking the Deleted filter above the list of responses.
Restore One by One
Restore responses one-by-one by clicking the Restore link associated with a response.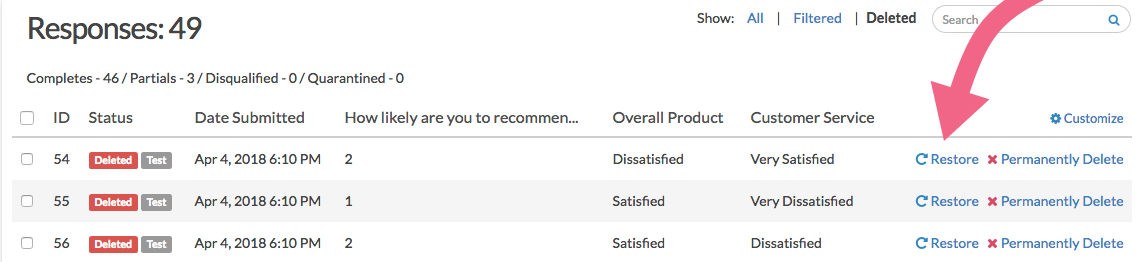
Restore Multiple Responses
- Select multiple responses to restore using the checkboxes to the left of each response. A bulk action menu will appear at the top of the response list.
- Click the Restore button to restore your selected responses.
Restore All Deleted Responses
If you need to restore all your deleted responses, you can do so in bulk. In the Deleted view, scroll to the bottom of the response list and click the Bulk Action link. Next, click Restore All Deleted Responses.
Permanently Delete Responses
Any responses that you have deleted will reside in the Deleted view on the Individual Responses tab. Responses that reside in your Deleted view can be restored and as such are not permanently deleted. If you need to permanently delete your responses, you can do so from this page.
Only Account Administrators have the ability to permanently delete data.
As with other actions on the Individual Responses tab, there are several options for permanently deleting responses. Before you permanently delete responses, there are a few things that you should be aware of.
Deleting responses permanently will:
- Delete the supplied responses
- Delete files associated with these responses
- Delete all other data associated with these responses
There is NO recovery method. Once permanently deleted, SurveyGizmo Support will NOT be able to help you restore these responses or associated data.
We recommend that you contact the survey creator or owner of the survey before doing this.
In order to confirm the permanent deletion, you will be asked to enter your SurveyGizmo password (the same password that you log in with).
Permanently Delete Responses One by One
While on the Deleted view, you can permanently delete responses one by one.
- In order to permanently delete responses one by one, click the Permanently Delete link associated with the response. You will see a confirmation screen appear.
- Carefully review the content of the confirmation screen.
- When ready, supply your password to confirm you understand this action is irreversible.
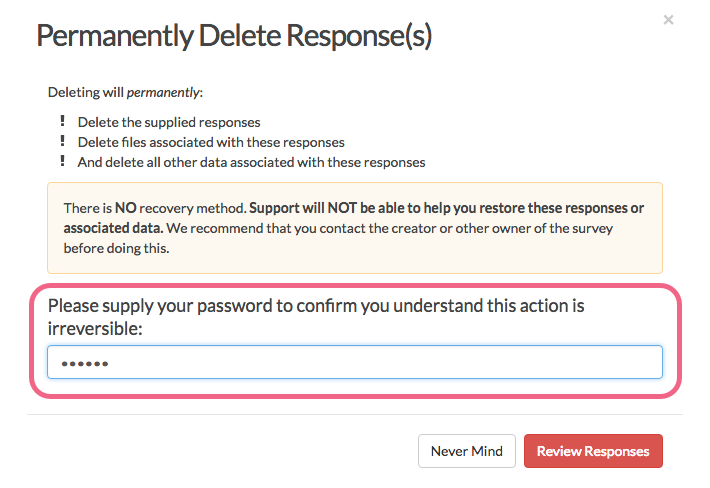
- Click the Review Responses button to proceed. On the next page, you will have a chance to review the responses that have been selected for permanent deletion.
- Check the box associated with each response that you want to permanently delete, and click Delete Response(s). This is the point of no return. Once permanently deleted, responses cannot be recovered.

Permanently Delete Multiple Responses
While on the Deleted view, you can permanently delete multiple responses at a time.
- In order to permanently delete multiple responses at a time, select the responses by clicking the associated checkboxes. A bulk action tool will appear at the top of the list.

- Click the Permanently Delete button to proceed to the next step. You will see a confirmation screen appear.
- Carefully review the content of the confirmation screen.
- When ready, supply your password to confirm you understand this action is irreversible.

- Click the Review Responses button to proceed. On the next page, you will have a chance to review the responses that have been selected for permanent deletion.
- Check the box associated with each response that you want to permanently delete, and click Delete Response(s). This is the point of no return. Once permanently deleted, responses cannot be recovered.


Considerations When Deleting
There are several features in SurveyGizmo that allow you to view/incorporate data from multiple surveys. When moving data to the trash (or permanently deleting), consider that the data might be used in one of the following features:
We recommend removing any surveys that are referenced in any of the above. If a survey is not removed, a notification will show in each of the above features indicating that one or more of the data sources has been moved to the trash, or permanently deleted.
FAQ
How are Response ID numbers assigned?
A Response ID number is assigned sequentially as soon as a respondent interacts with SurveyGizmo servers. Typically, this means clicking the Next button on page one of the survey.
If two respondents access your survey at around the same time, the respondent that submits the first survey page first (by clicking Next) will be assigned the next available Response ID number.
What is a New response?
A response will be tagged as New if it has been collected since you last logged in to SurveyGizmo. These New tags are not permanent and are intended to provide a visual queue.
— Mike.cordeiro on 05/05/2020
@Naveed: Thank you for your question!
I suggest looking into a data import and matching on response ID. This allows one to update new data into previously recorded responses. Follow the documentation below for specific instructions on how to complete this!
https://help.surveygizmo.com/help/data-import#bulk-update-existing-answers
I hope this helps!
Mike
Technical Writer
SurveyGizmo Learning and Development
— Naveed on 05/02/2020
how to modify/edit already recorded responses in bulk against specific questions?
Admin
— Andrew Sturtz on 12/20/2019
@Deidre: Great question! With a free account, you are able to delete a response which will free up a slot for an additional response.
See below for more information on free accounts:
https://help.surveygizmo.com/help/free-account-features
I hope this helps!
Andrew
SurveyGizmo Customer Support Team
— Deidre on 12/20/2019
If I delete incomplete surveys, would that make room for another respondent to complete a survey or will it still count against the 100 survey maximum?
Admin
— Andrew Sturtz on 12/16/2019
@Ravikumar:
Great question!
We do have the ability to download a list of unique survey links that can be distributed by another system. See below:
https://help.surveygizmo.com/help/create-unique-links
I hope this helps!
Andrew
SurveyGizmo Customer Support Team
— Ravikumar on 12/16/2019
Is there a way to get the Response Link (a unique URL to share via another system) programatically? We want to use this link to view the responses by a third party directly with out log in to the system.
Admin
— Dave Domagalski on 10/22/2019
@Avilela: Thank you for your question!
When you delete a response or multiple responses, you are deleting responses for the entire survey.
I hope this helps clarify!
David
Technical Writer
SurveyGizmo Learning & Development
— Avilela on 10/22/2019
Does deleting responses only delete the responses for the chosen question or the responses for the entire survey?
Admin
— Dave Domagalski on 08/07/2019
@Surveys: Thank you for your question!
I'm afraid that there is not a way to reset/clear all of the responses for a given survey page.
Having said that, the Data Import tool may offer a workaround.
You could export all of the data in your survey (CSV Export), clear out the necessary responses, and re-upload the data via the Data Import tool to override the initial responses:
- https://help.surveygizmo.com/help/data-import
- https://help.surveygizmo.com/help/data-import#bulk-update-existing-answers
You could then share the edit links with respondents.
It might be a good idea to discuss your specific use case with our Support team in case there is a better option:
https://help.surveygizmo.com/help/surveygizmo-support-hours
I hope this helps!
David
Technical Writer
SurveyGizmo Learning & Development
— Ben on 08/07/2019
Is there a way to "reset" (or clear) all of the responses on one page of a survey? I'd like to send the edit link to a respondent, and ask them to complete one specific page again. I can't figure out how to clear the original radio button responses.
Admin
— Dave Domagalski on 07/13/2018
@Kim: Thank you for your question!
Yes, a copy of the survey can be sent to a different email address via a Send Email Action:
https://help.surveygizmo.com/help/send-email-action
Depending on how you want to include the survey content, the options for hiding information will differ.
If you want to attach a copy of the survey as a PDF, the options for hiding information will be limited:
https://help.surveygizmo.com/help/send-email-action#attaching-a-pdf-of-the-response
If the above option does not work, you can merge content into the body of the email using merge codes. At that point, you have complete control over the content that you include into the body of the email:
https://help.surveygizmo.com/help/send-email-action#setup
I hope this helps!
David
Documentation Specialist
SurveyGizmo Customer Experience
— Kim on 07/13/2018
After a survey is complete, can a copy be sent to a different email address with information hidden or removed from view for that email only?
Admin
— Bri Hillmer on 05/10/2018
@Communications: Duplicate protection is not set up by default. You can review your options for duplicate protection here:
https://help.surveygizmo.com/help/duplicate-protection
I hope this helps!
Bri Hillmer
Documentation Coordinator
SurveyGizmo Customer Experience Team
— Communications on 05/10/2018
Do surveys automatically allow a person to only complete the survey once? If not, how can I change an ongoing survey to only allow one entry per person?
Admin
— Dave Domagalski on 04/25/2018
@Philanthropy: Thank you for your question!
The Individual Responses page does not provide an option for filtering for a certain time period.
For your scenario, I recommend downloading your responses via Results > Export. Here, you can create a CSV / Excel file of your responses and have the option to filter based on date, as well as a number of other criteria:
https://help.surveygizmo.com/help/excel-export
Filtering an Export:
https://help.surveygizmo.com/help/filter-export-data
I hope this helps!
David
Documentation Specialist
SurveyGizmo Customer Experience
— Philanthropy on 04/24/2018
My survey is ongoing and I want to be able to download weekly responses. How do I filter to only get responses for a certain time period?
Admin
— Dave Domagalski on 03/27/2018
@Bert: Thank you for your question!
As you suggested, after downloading a PDF (or another file type) from SurveyGizmo, it should be placed in your computer's "Downloads" folder.
However, these settings can be overridden/customized at the browser level. The first step in troubleshooting this is to confirm that your browser settings for downloads have not been updated from their defaults.
If that is not the case, our Support team can help troubleshoot this further:
https://help.surveygizmo.com/help/surveygizmo-support-hours
I hope this helps!
David
Documentation Specialist
SurveyGizmo Customer Experience
— Bert on 03/27/2018
After the download is complete, you'd expect to find the file or pdf in the "Downloads" folder, which isn't the case. Where are the downloads dropped?
Admin
— Dave Domagalski on 09/01/2017
@Violeta: I'm afraid multiple responses in SurveyGizmo cannot be merged into one.
My recommendation in this situation is to decide which of the two responses you intend to keep and to edit that response to include information from the other response.
Once you have made these edits, the response that you don't want to keep can be deleted.
I hope this helps!
David
Documentation Specialist
SurveyGizmo Customer Experience
— Violeta on 09/01/2017
I received from 1 respondent 2 reports. they are not identical so I want to merge them into 1. How?