1 of 13
Start by clicking the Create Survey button on your account homepage. Give your new survey a name and click Start Building.

Pat yourself on the back; you've created a survey! Ok, so it's not that simple. Click Next for the next step.
2 of 13
Add Pages to Your Survey
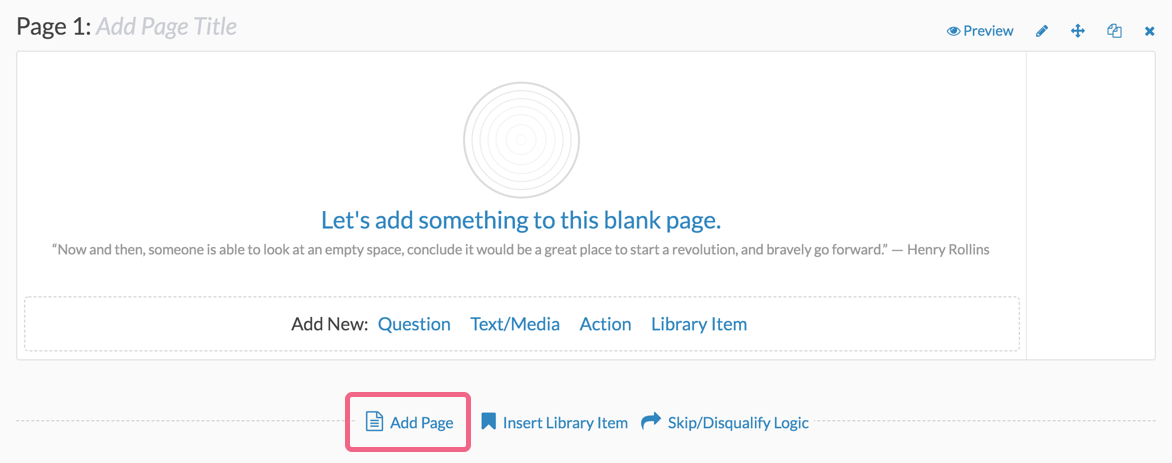
New SurveyGizmo surveys will always start with two pages, an initial page, called Page 1, and a Thank You Page. You can add as many questions to a survey page as you wish. You can also add pages by clicking Add Page between any two pages in your survey.
3 of 13
Add a Question
Next, start adding questions for your survey respondents by clicking Question at the bottom of the page or between any two existing questions.

4 of 13
Select Your Question Type
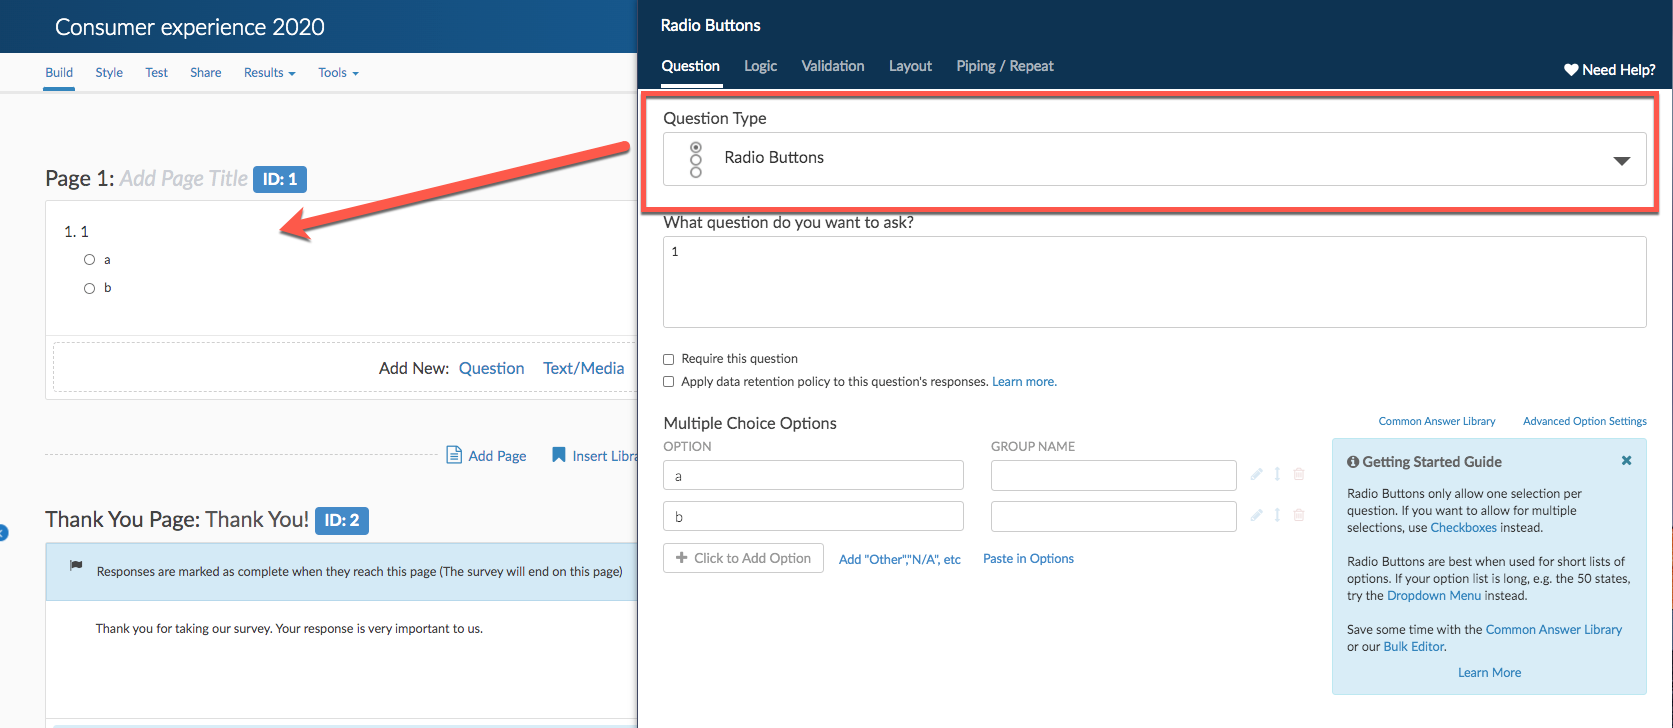
Upon creation, questions will default to the Radio Buttons question type. This commonly-used question allows respondents to select a single choice from a list. Selecting the right question type can be tricky because this is the key to getting the data you need. Never fear, though; we're here to help!
5 of 13
Select Your Question Type
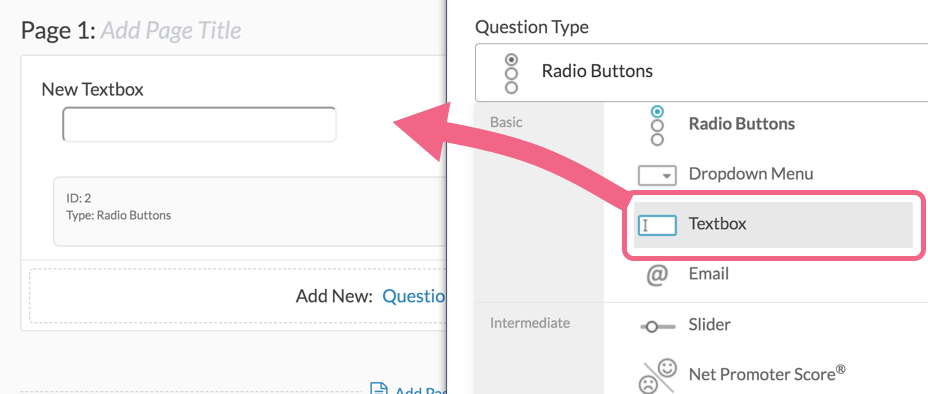
Using the Question Type dropdown, select different question types and check out the preview of the question in your survey on the left; no commitment needed!
6 of 13
Need more help selecting a question type?
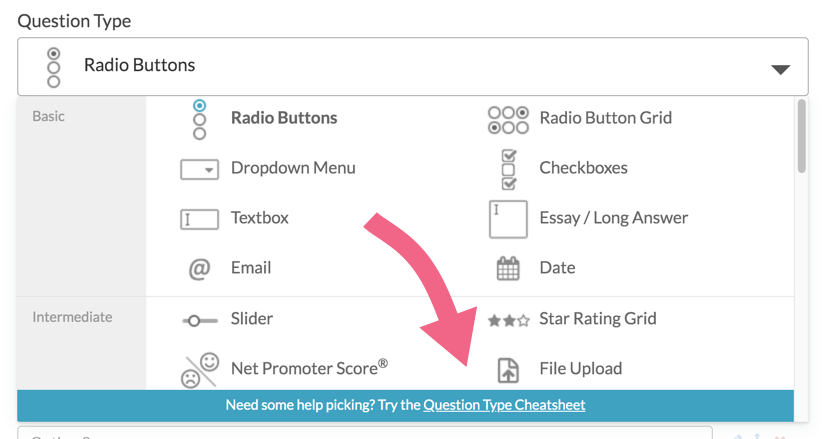
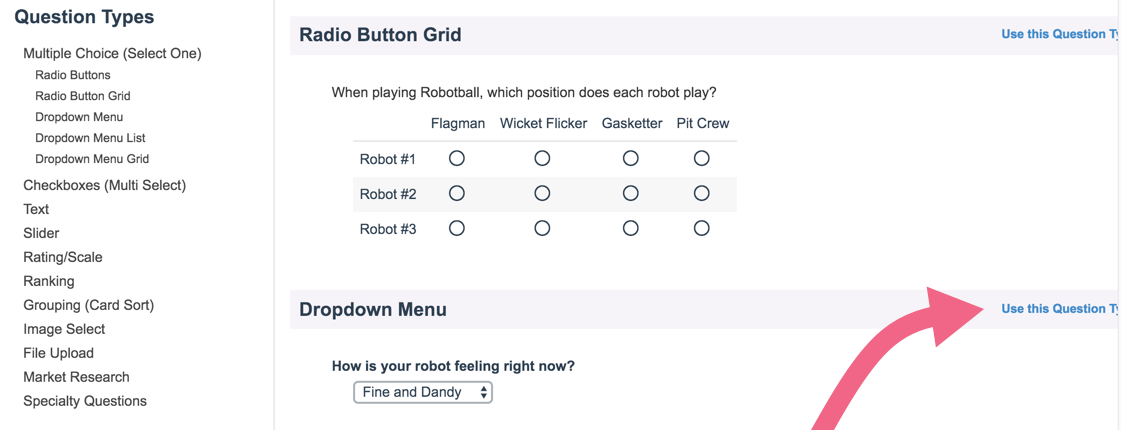
We've built in a Question Types Cheatsheet to help you make a decision right inside the application. Scroll to the bottom of the question types dropdown menu and click the Question Types Cheat sheet link to view and interact with example questions.
7 of 13
Need more help selecting a question type?
If you like what you see, simply click the Use this Question Type link to select the question.
To learn even more, check out our Question Type Tutorials to see question and reporting examples!
Once you've selected the right question type for you, click next to learn how to add your question text.
8 of 13
Enter Your Question Text
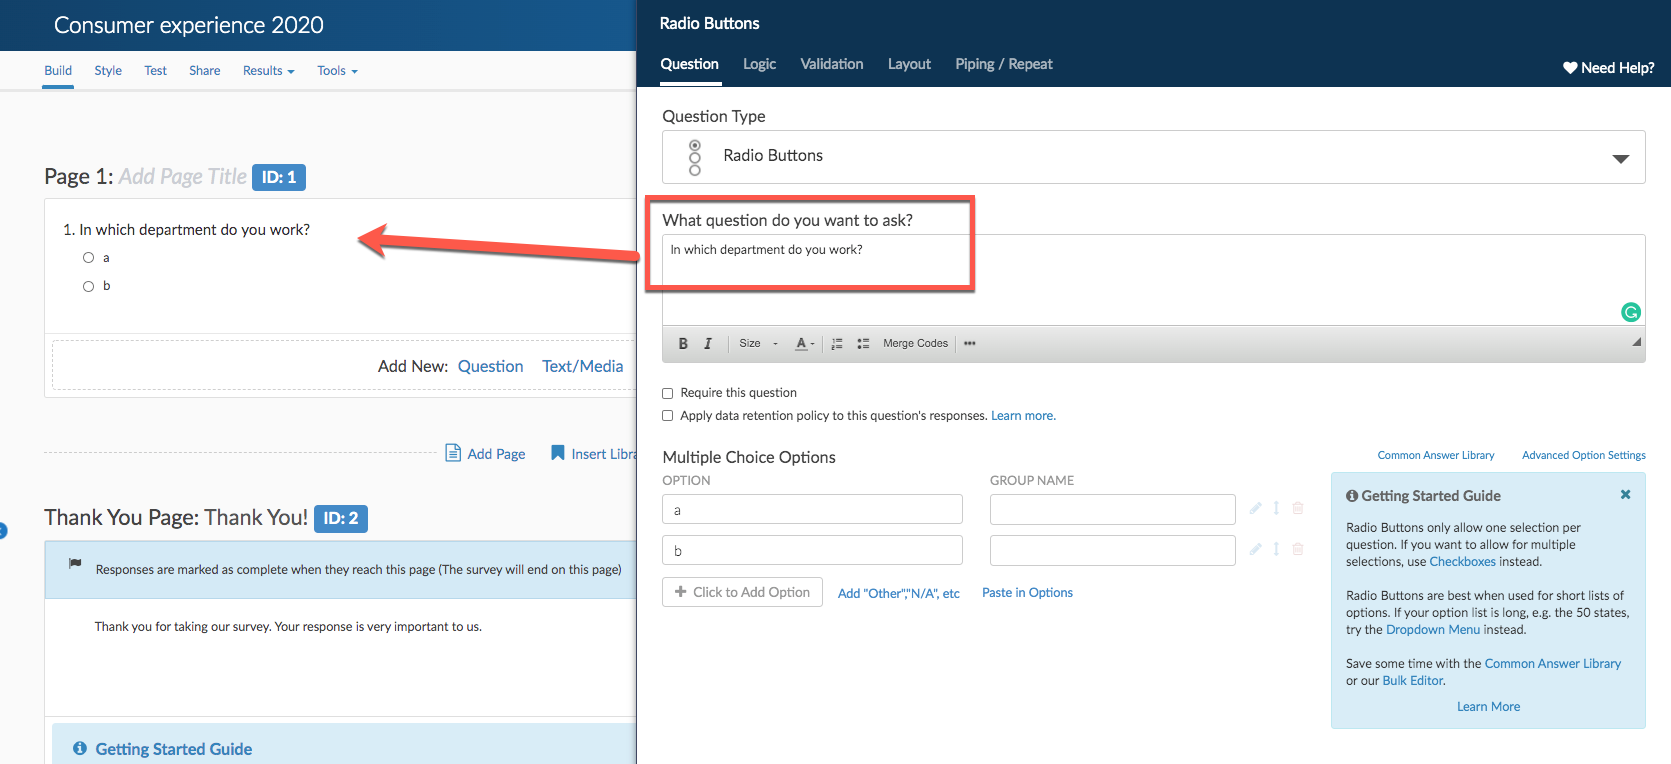
Next, enter the question you wish to ask. Notice this will dynamically update the survey you are building on the left!
9 of 13
Add Your Answer Options
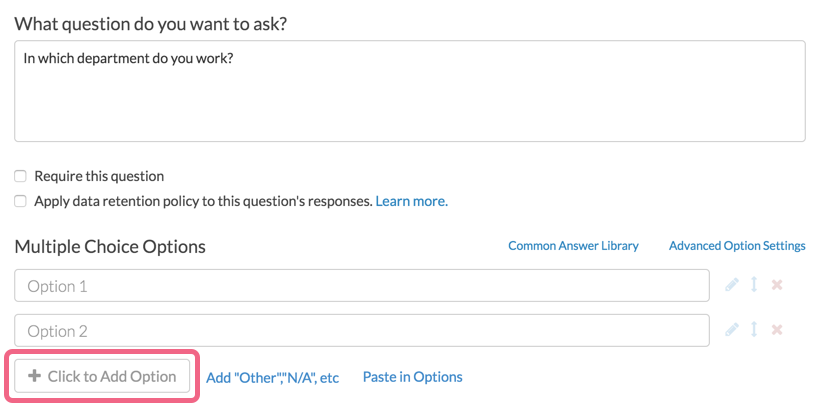
Your next step is to add answer options for your respondents to select. You can enter your answer options one by one. Click to Add Option at the bottom of the list to add new answer options.
10 of 13
Add Your Answer Options
You will also have an option to Paste in options. When pasting from a list, each option should be on its own line.

11 of 13
Add Your Answer Options
For many of our question types, you also have a library of common answer options (like US states or demographic information) available to choose from.

12 of 13
Add Your Answer Options
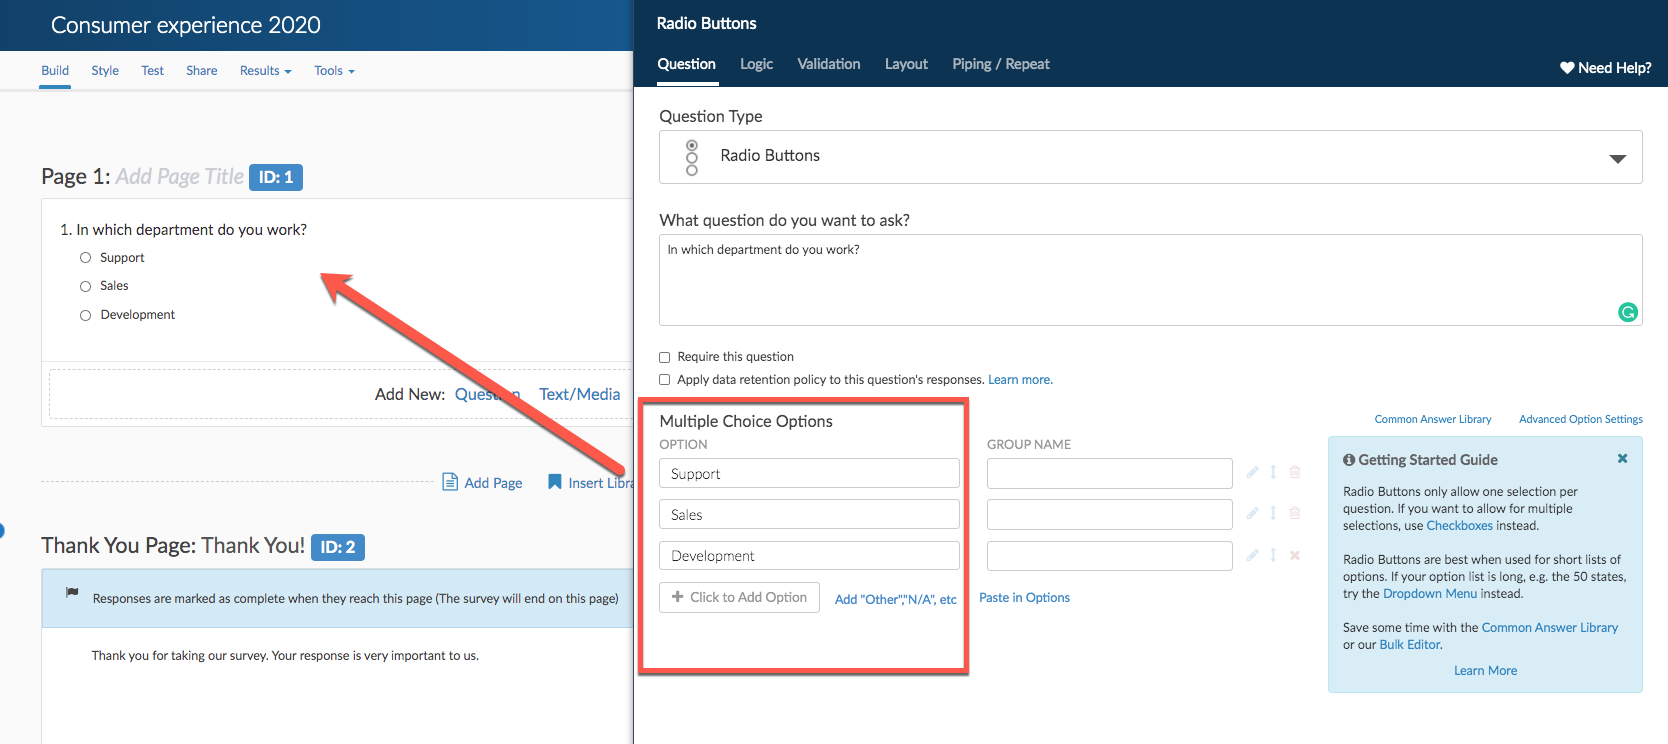
As with the question title, be sure to check out the preview of what your question will look like as you add answer options. When you are all finished, click Save Question. Rinse and repeat to finish building your survey!
13 of 13
Next Steps
- Would you rather create your survey using a Word document?
- Want to send an email when new responses are collected? Check out our Send Email Action Tutorial to learn how to set this up!
- Check out your survey on the Style tab to customize your survey's look and feel. Check out Style Your Survey to learn more!
- Happy with the look and feel of your survey? Learn how to Test Your Survey to ensure your project is a success!
- Want some data right away? Learn how to Share a Link to Your Survey.
Admin
— Dave Domagalski on 01/31/2019
@Gcottrell: Thank you for your note!
Based on your question, I think the 'copy survey' function may be the best route:
https://help.surveygizmo.com/help/copy-a-survey
When you copy a survey, all questions are automatically copied and ID numbers are preserved.
I hope this helps!
David
Technical Writer
SurveyGizmo Customer Experience
— Gcottrell on 01/31/2019
So If i copy an existing list of questions to use on a quarterly basis with a new group of customers, i have to paste the questions each time? Do I need to change the javascript ID, if so how?
Admin
— Bri Hillmer on 11/15/2018
@Cindy: I'm sorry for the trouble! We verified your account; you should be all set!
Bri Hillmer
Documentation Coordinator
SurveyGizmo Customer Experience Team
— Cindy on 11/15/2018
I'm not getting the welcome email from survey gizmo. What am I doing wrong?
Admin
— Bri Hillmer on 09/02/2016
@C.rinaudo: It sounds like the quiz score would work well for you!
Here is our documentation the quiz score in general:
https://help.surveygizmo.com/help/quiz-score
More specifically it looks like you need to set up a quiz score per topic:
https://help.surveygizmo.com/help/quiz-score-by-page
I hope this helps!
Bri
Documentation Coordinator/Survey Sorceress
SurveyGizmo Customer Experience Team
— C.rinaudo on 09/02/2016
Hello, I'm wanting to create a survey on a commonly used inventory (medical) that calculates someones risk. Essentially, there are 3 answers and a marketing system - always = 4 - sometimes = 2 - no = 0. There are 25 questions divided into 3 evaluations (F for functional, E for emotional, and P for physical).
I'm wanting an automatic calculation of the 3 individual scores (F, E, P) and give a total. This is a link to see what it looks like https://www.southamptonhospital.org/Resources/10355/FileRepository/Forms/Dizziness%20Hanicap%20Inventory%20-%20English.pdf I look forward to your reply
Thanks in advance
Admin
— Bri Hillmer on 01/21/2016
@Silsila.rokai: We have 2 ranking questions available. You can use the Ranking Grid if you prefer a table format or try the Drag & Drop Ranking for a more interactive question. Here are our tutorials on these 2 question types:
http://help.surveygizmo.com/help/article/link/ranking-grid
http://help.surveygizmo.com/help/article/link/drag-drop-ranking
I hope this helps!
Bri
Documentation Coordinator/Survey Sorceress
SurveyGizmo Customer Support
— Silsila.rokai on 01/21/2016
hello,
How do you creating a ranking question. Where the person ranks from 1-7?
Admin
— Bri Hillmer on 08/20/2015
@Susan: You can create unlimited surveys and unlimited responses with all of our plan levels!
Bri
Documentation Coordinator/Survey Sorceress
SurveyGizmo Customer Support
— Susan on 08/19/2015
Can I create unlimited number of survey's with a pro account?