The look and feel of your survey can be just as important as the questions you ask. We have selected a default pre-built theme that will give your survey a nice, clean look and feel so you can send out your survey without bothering with our style options. But, with all these options, we dare you to ignore the possibilities!
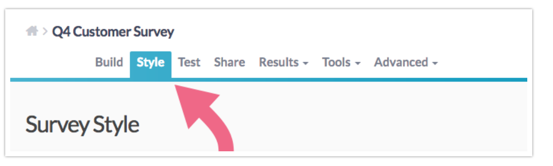
To get started customizing your survey's look and feel, head over the Style tab!
Step 1: Choose a Theme
Click the Themes thumbnails to get started. You can choose:
- Pre-Built Themes
- Quick Color Schemes
- Your Theme Library - if you have saved any of your previously created themes, these will be available here.
You can also skip this step altogether and just jump in and style your survey from scratch.

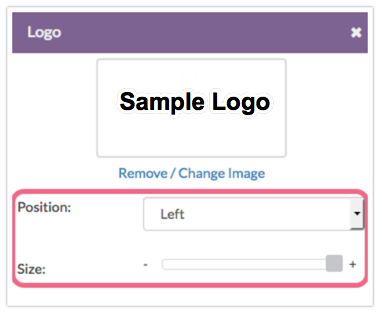
Step 2: Add a Logo
Looking to add your logo to the top of your survey?
- Click the Logo thumbnail to get started.
- Next, click the Add Image link.

- From here you can select an image from your SurveyGizmo File Library, click Upload image file to upload a new image from your computer, or paste an image link into the Image URL field (if the image is hosted externally).

- Use the Position and Size controls as needed.
- Position can be set as Left (default), Center, and Right.
- Use the Size slider to make the image larger (+) or smaller (-).

For best results, we recommend header images of up to 750px wide and 200px tall.
If you would like your header image to display like a banner that stretches across the entire page, we recommend image files 1000px wide and 200px tall.
Step 3: Tweak Your Colors
The Background, Page, Header, Button/Accent and Text thumbnails can be used to take your survey theme to the next level using our various color and image options.
Customizing Colors
- To get started customizing your colors, click on the thumbnail for the area of the survey you wish to modify, Background, Page, Header or Button/Accent.
- You can choose from the color palette or use the color picker tools on the right to select a hue then adjust it with the darkness and transparency sliders.

- Below the color picker, there are additional tools available to get your survey colors just right. If you have the exact HEX Code for the color you wish to use, you can paste it in the HEX Code field.

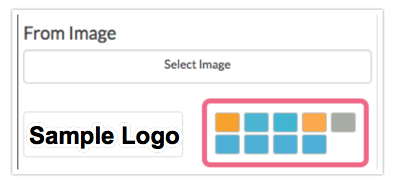
Get Colors From an Image
The option to get colors From Image is one of our favorite features! This tool works great when you need to perfectly match the colors of your survey to your logo!
- Get started by clicking Select Image.
- Next, you can select an image from your SurveyGizmo File Library, click Upload image file to upload a new image from your computer, or paste an image link into the Image URL field (if the image is hosted externally).
- Once an image is selected, the primary colors from the image will display as thumbnails below the image. Then, simply click the color thumbnail you wish to use.

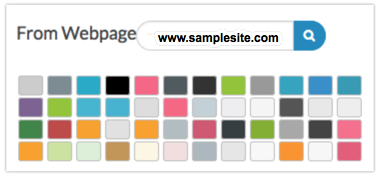
Get Colors from a Webpage
Last, you can enter a website URL to extract colors from. Simply enter the URL in the From Webpage field and click the magnifying glass. This will fetch the colors from the website and display them as thumbnails. Then, you can simply click on the color you wish to use.
Please note, this feature works by scanning the CSS of the website, so it will not pull colors from images on the website. If you wish to pull the colors from an image on the website, say a logo, use the Pick from Image tool instead. In addition, this feature will only pull colors from the first three CSS files on the website so any colors from CSS stylesheets four and greater will not be fetched.
Step 4: Explore Survey Background Options
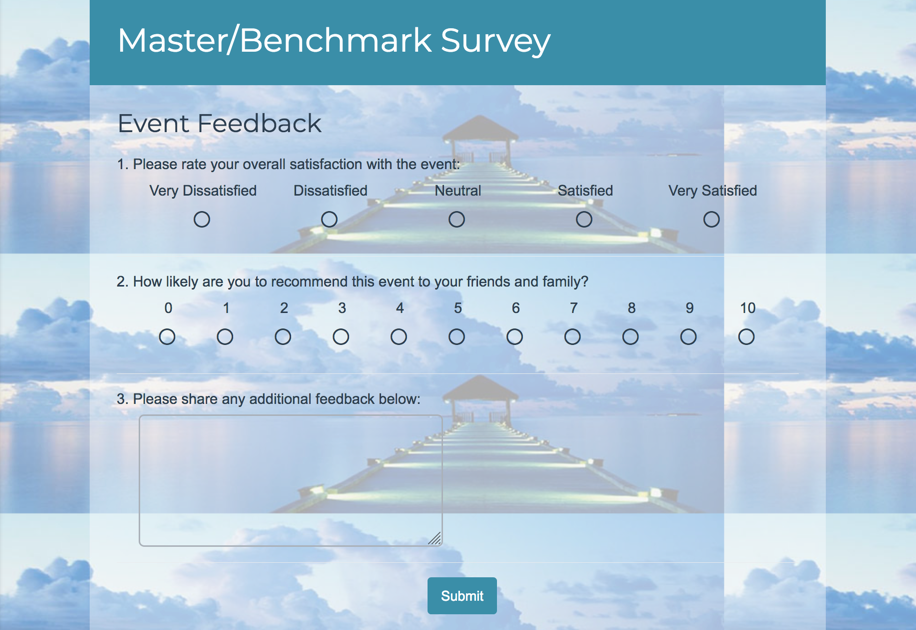
Looking to add some flair to your survey? Adding a background image is a great way to capture potential respondents' interest from the moment they click your survey link. You can choose from our library of images or upload your own image!
Or, if you are looking for more polish than flair, you can choose from our patterns and gradients to use as a background in your survey.
Using a Background Image
- Go to Background > Images and choose from our library of images as your survey background.

- Alternatively, click the link to Choose from Image Library to choose an image from your SurveyGizmo File Library. There is also an option to Upload image file as well as the option to paste an Image URL (if the image is hosted outside of SurveyGizmo).
- Once you select an image, select how you wish to display it in the first dropdown menu:

Cover Screen - This option will use the image to fill the background. If it is not big enough it will be stretched to fill the window.

Best Practice Tip: Recommended Background Image Size
For background images you wish to use as a cover screen, we recommend (as a rough guideline) 1920 x 1080px or smaller with the same height-width ratio (1.777 to 1).
For more info on full-screen background images check out this awesome article: http://www.webmalama.com/the-best-full-screen-background-image-sizes-for-web-design/
Tile - This option will repeat the image in tiles to fill the background. This option is best for smaller images.
Left - This option will display the image to the upper left corner of the background.
Right - This option will display the image to the upper right corner of the background.
Center - This option will display the image in the center top of the background.
- Once you've selected how you wish to display your image, adjust the image Brightness using the slider control.

- If you wish, you can also adjust the transparency of the survey form to show off your image. To do so, click the Page thumbnail and adjust the Transparency.

Remove a Background Image
If you need to remove a background image, click Background > Images > Remove Background.

Using a Pattern
- If you wish to use a pattern as the background of your survey, we recommend starting by selecting a Background color, as this will be combined with the pattern options to create some really cool effects.
- Next, go to Background > Patterns to select a pattern to use in the background of your survey. Adjust your pattern's brightness using the control just above the pattern thumbnails.
- Finally, in addition to adjusting your pattern's brightness, you can also adjust the transparency of the color that is mixed with your pattern to get that perfect look. To do so, go to Background > Color picker and adjust the Transparency control to the far right up and down.


Using a Gradient
- For gradients, start by selecting a gradient that you like and adjust it as you wish.
- Once you select a gradient to start with, you can change the colors by clicking the arrows below to display a color picker. You can also add a new color to the mix by clicking anywhere on the bar.
- Last, change the gradient to display Left to Right as opposed to Top to Bottom if you wish!


Browser Compatibility
Internet Explorer 8 does not support backgrounds. Backgrounds will display on all other modern browsers.
Step 5: Choose Fonts
- To change the font of your survey, go to Style > Text > Header Text and/or Body Text.
- Select a font, font size and click the bold button if you wish for your text to display as bold.


More Fonts Using Google Fonts!
Not seeing a font that matches your particular style? Add one from Google Fonts!
- At the bottom of both the Header Text and Body Text font dropdown menus, there is an option to +Add Web Font. Select this option to utilize the power and variety of Google Fonts in your survey.

- Next, head over to Google Fonts and find the typeface that suits your survey. We recommend having your survey in one window/tab and Google Fonts in another. Click the + button once you've made your decision.

- If needed, choose the appropriate styles/character sets you wish to use, then copy the Standard code to your clipboard.

- Head back over to the Style tab of your survey and enter a name for your Google font in the Font Name field and paste the code from your clipboard in the Font URL field.


The Font Name must be entered as you see it in Google Fonts. You will also need to delete all but the link portions of the code in order for it to work:
<link href="https://fonts.googleapis.com/css?family=Roboto" rel="stylesheet">
The highlighted portion of the Standard embed code is what should be pasted.
Step 6: Choose Your Layout Options
Under the Layout thumbnail, there are a number of options available. Via Layout Options you can toggle the following:
- Question Borderes
- Back button
- Progress Bar
- Use Default Browser Icons for Radio Buttons and Checkboxes
Via Widths/Sizing, you can adjust the following values:
- Page width
- Page content width, a.k.a the survey
- Space above header
- Rounded corners
- Comment Box Width
- Table Row Header With
- Table Column Width
One of the most important considerations under the Layout thumbnail is your Desktop Interaction and Mobile Interaction. These determine how survey respondents experience your survey questions and pages. Hover your mouse over each option to see a quick preview. Below we will describe and demo each interaction in a survey.
Desktop Interactions
Standard (default) - Survey respondents will experience your survey much like how it is displayed on your Build tab. Check out this survey link on your desktop to see it in action:
http://www.surveygizmo.com/s3/1877746/Default-Interactions
One at a Time - This desktop interaction option will display one question at a time. When the respondent submits the question it will slide to the left and the next question will slide in from the right. Check out this survey link on your desktop to see it in action:
http://www.surveygizmo.com/s3/1877760/One-Question-at-a-Time
Mobile Interactions
Standard - Survey respondents will experience your survey much like how it is displayed on your Build tab. Check out this survey link on a mobile device to see it in action:
http://www.surveygizmo.com/s3/1877746/Default-Interactions
One at a Time (default) - Survey respondents will see one question at a time. When the respondent submits the question it will slide to the left and the next question will slide in from the right. Check out this survey link on a mobile device to see it in action:
http://www.surveygizmo.com/s3/1877760/Mobile-One-Page-at-a-Time
Not Mobile Optimized - This option will render the survey as it is designed for desktops on a mobile device.
Saving Changes
One of the great things about the way the Style tab works is that you can make a series of changes and then decide whether you wish to apply them. If you do, simply click the Apply Changes button. If not, click the Reset Changes button.

If you try to navigate away from the Style tab without applying your changes, we will warn you that you have unsaved changes. You will have the option to either Save or Do Not Save before leaving the Style tab.

Preview Your Survey Theme Per Device, Language, and Link
Once you've made your styling decisions, you can preview how your survey will look on a desktop, tablet, and mobile device. Click the icon in the upper-left corner to see a rough approximation of how your survey will display. We can't account for all screen sizes and display resolutions but this will give you a good place to start!

You may also want to check how your survey looks in different languages (assuming that you have added translations). If you haven't added a language yet, click Add a Language to navigate directly to the Text & Translations interface.

Last, if you are using multiple share links for your survey, you can set different themes for each link. This is a great way to target certain audiences with your look and feel or to simply segment responses for tracking purposes. If you haven't created additional links yet, click Add a Link to navigate directly to the Share tab.
Learn more in our Multiple Themes, One Survey Tutorial.

Custom CSS and HTML
You can add custom HTML and/or CSS to your theme by scrolling to the bottom of the survey preview and clicking the link to access the HTML/CSS Editor.
- On the Custom CSS tab, you can append your custom CSS to the survey theme.
- On the Custom HTML tab, you will see the HTML that is included in your survey theme. This can be customized, but use care. If you'd like to learn more about the standard HTML merge codes for surveys visit our Custom Theme Tutorial.
- Finally, we now provide you with a space to append HTML to the head of the survey on the Custom <HEAD> tab. For example, if you want to use a special font you can link to it in the head of the survey.
Make sure to Save Changes once you're done and then you, good survey friend, are good to go!
Scripting and Other Custom Solutions
We’re always happy to help you debug any documented script that is used as is. That said, we do not have the resources to write scripts on demand or to debug a customized script.
If you have customization ideas that you haven't figured out how to tackle, we're happy to be a sounding board for SurveyGizmo features and functionality ideas that might meet your needs. Beyond this, check out our Professional Services; these folks have the scripting chops to help you to achieve what you are looking for!
Admin
— Mike Cordeiro on 04/16/2020
@Tim: Thank you so much for your question!
One can make changes to the survey toolbar via the Response Setting page. Follow the documentation below for more information on how to add these to your survey:
https://help.surveygizmo.com/help/language-bar
Hope this helps clarify!
Mike
Technical Writer
SurveyGizmo Learning and Development
— Afdeling on 04/15/2020
If a user wants to change the language they have to select the icon at the bottom and click the language at the top of the page. Can that be changed?
Admin
— Dave Domagalski on 04/26/2019
@Bruce: Thank you for your question!
To specify the maximum page width in pixels, CSS customization is required.
The .sg-body CSS class should be a good place to start.
I hope this helps!
David
Technical Writer
SurveyGizmo Customer Experience
— Bruce on 04/26/2019
I would like to be able to specify a maximum page width in pixels not percentages. How can I do this?
Admin
— Bri Hillmer on 02/14/2019
@Ryan: Changes to survey style can only be saved to be used in your live surveys on our paid plans.
Bri Hillmer
Documentation Coordinator
SurveyGizmo Customer Experience Team
— Ryan on 02/14/2019
The custom survey style I designed isn't showing up when I test the survey. I am only using the free version, but I thought some basic style options (add company logo, change color scheme, etc.) were still available at this level. Any idea why this isn't showing up?
Admin
— Dave Domagalski on 10/12/2018
@Rebecca: Thank you for your question!
What you are looking to do can be done.
My suggestion is to create multiple links for your survey (one for US and one for CA):
https://help.surveygizmo.com/help/tracking-links
Once you have a separate dedicated link for each location, you can create and apply a different theme to each link:
https://help.surveygizmo.com/help/use-a-different-survey-theme-per-share-link
I hope this helps!
David
Documentation Specialist
SurveyGizmo Customer Experience
— Katie on 10/12/2018
I am sending the same survey to two populations (One in Canada and one in US). We would like for the header image to differ depending upon where they live. Am I able to do this - or do I need to create two versions of the survey? (The header will be the ONLY difference between the surveys.)
Admin
— Dave Domagalski on 06/13/2018
@Shannon: Thank you for your question!
I'm afraid that there is not a setting to display grid rows one at a time for a specific question.
SurveyGizmo does offer a one-at-a-time interaction for both mobile and desktop surveys, though this interaction is applied to all questions in the survey:
https://help.surveygizmo.com/help/survey-interactions
If you are wanting to do this with just one specific question, I would recommend deleting the grid and replacing it with individual questions for each row.
I hope this helps clarify!
David
Documentation Specialist
SurveyGizmo Customer Experience
— Shannon on 06/13/2018
Hi is there a way to split a slider list (or any list/grid) to display items one at a time on the respondents screen without having to create multiple sliders? As another example say you create a radio button grid but then decide you want the items in the grid to be displayed separately (just for this one grid), is the only option then to delete the grid and create individual radio buttons for each question?
Admin
— Dave Domagalski on 01/23/2018
@Leah: Thank you for your question!
There are a couple of options worth exploring here.
One option is to add a 'Text/Media' element to the top of a specific page where you want the image:
https://help.surveygizmo.com/help/image
Another, more advanced option is to utilize CSS to hide the logo image on all pages and then show it only on specific pages.
The following documentation is a good resource for this:
https://help.surveygizmo.com/help/survey-title-first-page
I recommend starting at the top and stopping just before the section titled 'Use Page Titles in Place..." for your purposes, focusing on the 'Optional Customizations' section which discusses logos specifically.
I hope this helps!
David
Documentation Specialist
SurveyGizmo Customer Experience
— Leah@clearme.com on 01/23/2018
Hi! Is there a way to add an image to a page header rather than applying it to all pages in the entire survey?
Admin
— Bri Hillmer on 01/30/2017
@Lynsay: We have not built out the ability to select a default theme I am sorry to say.
I'll make note of this again for discussion of possible future improvements.
Bri
Documentation Coordinator
SurveyGizmo Customer Experience Team
— Lynsay on 01/30/2017
Hi
Following on from Susanne's comment last year, is there now a way to make our custom theme the default survey theme for all surveys?
Thanks
Admin
— Bri Hillmer on 10/19/2016
@Clare: The page font changes along with the header font so that they match. If you wish to change the page title separately you'll need to use a little CSS.
The following CSS should do it:
.sg-body .sg-page-title {
font-family: Verdana !important;
}
Paste the above code on the Custom CSS tab of the HTML/CSS Editor available in the lower-left corner of the survey preview on the Style tab. Change the Verdana portion to the font you wish to use making sure to preserve the !important at the end.
You'll want to make sure that you are using one of our existing web fonts.
I hope this helps!
Bri
Documentation Coordinator/Survey Sorceress
SurveyGizmo Customer Experience Team
— Clare on 10/18/2016
Hi - How do you change the page title font? It's very clear how to change the header and body texts under the Style tab but I haven't been able to find the page title. Thank you
Admin
— Bri Hillmer on 05/09/2016
@Info: The checkbox grid will not advance automatically as this is a multi select question and as such there is no way to tell when the respondent is done selecting options in order to advance automatically.
Bri
Documentation Coordinator/Survey Sorceress
SurveyGizmo Customer Support
— Info on 05/08/2016
Is there a way to have the survey advance automatically with the 'one at a time' / checkbox grid?
Admin
— Bri Hillmer on 03/31/2016
@Dave: I'm sorry to say that there is not a way to apply a selected theme to all surveys. This is a great idea though; I will make note of this for future improvements!
Bri
Documentation Coordinator/Survey Sorceress
SurveyGizmo Customer Support
— Meghan on 03/31/2016
Is there a way to quickly change all existing survey's to one specific theme without having to go into them one by one?