Common questions and troubleshooting tips concerning your survey's Individual Responses tab.
How do I view my survey responses?
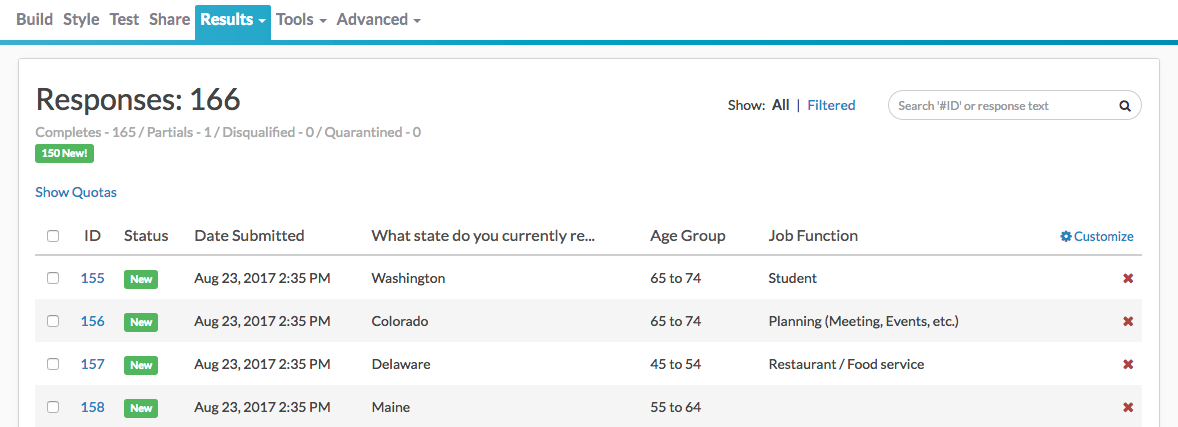
Under Results > Individual Responses you can review each of your individual responses. At the top, you'll see an overview of how many complete, partial and disqualified responses have been collected. If you are using the data cleaning tool to quarantine responses you have a count of quarantined responses. Finally, you'll have a count of how many new responses have been collected since you last logged in.
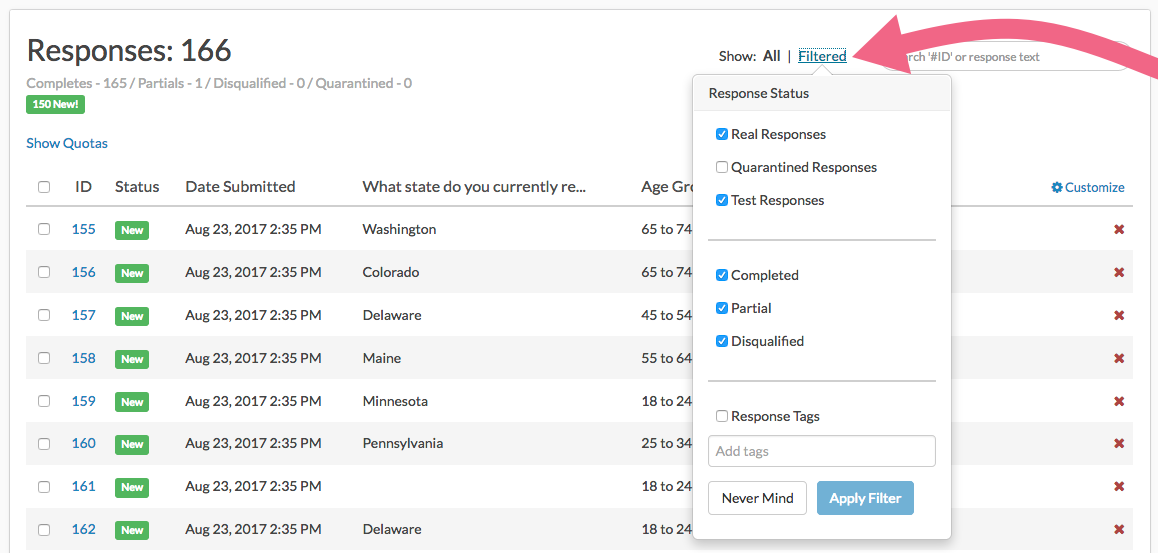
Below the overview is the list of responses. You can filter your list of responses by Response Status (including Real, Quarantined or Test and Completed, Partial or Disqualified). You can also search for responses containing certain data or tags using the Search box.
The Individual Responses page also allows you to customize, edit, and download your individual response data. Learn about these, and other options, by visiting the expanded documentation.
How do I customize my Individual Response view?
By default the response grid on the Responses tab will display Date/Time and the first four questions in your survey. Don't fret though, you can change this to display the data that this is most important to you!

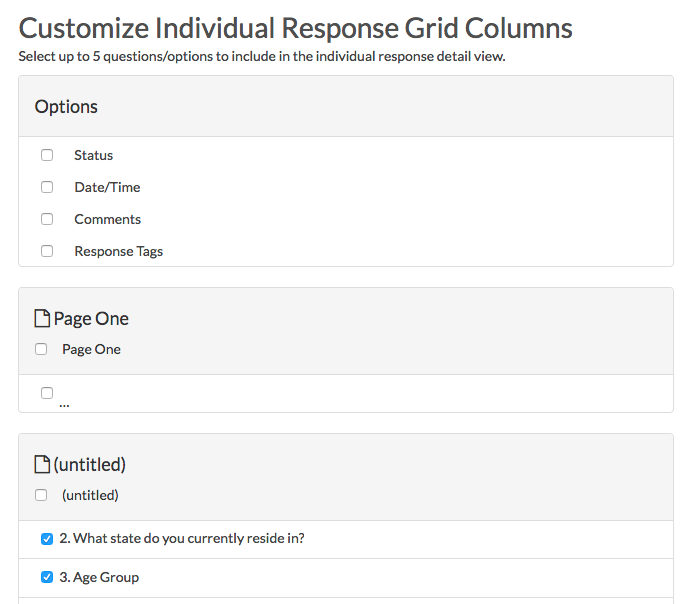
To do so, click the Customize link in the top right corner of the grid. In the popup, select up to 5 questions you wish to include and click Save. When you return to your Responses tab, the data that is most important to you will display there!
Visit the expanded documentation to learn more!
How is the response ID number assigned? Can I reset the response ID?
When you navigate to Results > Individual Responses, you will notice that each response is assigned an ID number. This ID number is assigned chronologically. For example, the first respondent to submit data to your survey will be assigned ID 1, the next will be assigned ID 2, and so on.
- The response ID number is assigned to every response status (Test, Partial, Disqualified, Complete, etc).
- The response ID cannot be updated/edited.
- Deleting a response does not free up its response ID.
- Deleting all responses does not reset the response ID count*.
*If you have submitted Test Responses (or other responses) to your survey and need to reset the response ID count, the best option is to make a copy of your survey. Copying a survey does not copy responses and as such will allow you to start collecting responses starting at ID 1.
Where is my response data?
If you submitted a test response and are not seeing it right away don't panic! This is normal.
Understanding Response Processing
Response data is subject to response processing, which can vary based on server load. If you are looking to access response data, the time between when a response is submitted and when the data is available in Individual Responses, Reports, or Exports can be upwards of 5 minutes.
However, most of the time your responses will process in about a minute or two.
When does SurveyGizmo capture respondent data?
Data is collected in SurveyGizmo surveys when respondents click the Next and Submit buttons at the bottom of each page. Learn more about how this affects various survey features in our full tutorial on When and How SurveyGizmo Captures Respondent Data.
What do the different response statuses mean?
Survey responses in SurveyGizmo will have various statuses. Below we'll discuss what each status means.
Responses are Real, Test or Quarantined.
- Real Responses - Responses collected via live links and other share methods available on the Share tab.
- Quarantined Responses - Responses can be marked as quarantined in bulk using the Data Cleaning Tool. Quarantined responses will be automatically filtered out of your reports and exports.
- Test Responses - Test responses can be created in multiple places. Responses recorded via the Test tab, either manually or auto generated, will be flagged as Test data. Responses that are collected via test email campaign links will also be marked as Test.
Responses also have a completion status of Complete, Partial, Disqualified or Deleted.
- Complete - The respondent reached the Thank You page of your survey. These are the best types of responses!
- Partial - The respondent clicked the Next button on at least the first page but has not yet reached the Thank You page.
- Disqualified - Responses where disqualification logic or quotas were triggered within your survey.
- Deleted - The response was manually deleted here on the Responses tab by clicking the red X next to the response.
Responses that have been collected since your last login will be flagged as New. If you are curious about exploring this topic further, visit the expanded documentation.
Can I convert my Partial responses to Complete responses?
A survey response in SurveyGizmo is marked as Complete when the respondent reaches the Thank You page. All other responses will be marked as Partial. Sometimes for the sake of organization or reporting, you may want to change the status of partial responses to complete.
Manually Mark Responses as Complete
If you have already collected data and wish to mark your partial responses as complete, you can do so on the Data tab of an individual response. Click the Convert Partial to Complete option located in the upper right.

To convert multiple Partial or Disqualified responses at once, select the responses on the Individual Responses tab then click Select Bulk Action > Convert Responses to Complete.
View the expanded documentation for additional information.
Why are my responses blank?
There are a couple of scenarios where you might have responses under the Individual Responses section of your Results tab that include no data.
Complete responses with no data - If all of your survey questions are unrequried, survey respondents can make it through the entire survey without recording any data. This response will still show as a completed response under Individual Responses.
Partial responses with no data - Partial responses with no data can be the result of unrequired questions. Alternately (even if you have required questions on the first page), responses are marked as partial in SurveyGizmo when the survey respondent clicks the Next button on the first page thus submitting data to our database.
Under Individual Responses, partial responses will be flagged as such in the Status column. By default, Partial responses are not included in reports and exports but you can easily change this. Learn how!
Why do I have required questions left unanswered in complete responses?
Here and there you may come across a complete response where required questions are left unanswered. Wondering how this might happen?
There are usually two scenarios where this might happen:
- This can happen if the respondent does not have JavaScript enabled on their browser. The required setting is run using JavaScript and, when disabled, the required functionality will not work.
- A rarer scenario can come up where the respondent did answer the questions and then used the browser's back and next buttons instead of those in the survey.
If you've checked with your respondent and confirmed that JavaScript is, in fact, enabled, contact us and we would be happy to dig a little further.
There is one more scenario that can yield a response that appears to be a complete response but a required question is left unanswered. The scenario is as follows:
- You have a one-page survey with several questions (some of these questions are required while others are not)
- A respondent answers most of these questions leaving at least one of the required questions unanswered.
- When the respondent clicks the Submit button, the survey throws an error letting them know that they have failed to answer a required question. The respondent then leaves the survey without answering this question.
- When a respondent clicks next or submit on a page, the page is sent to SurveyGizmo servers and thus any answered questions are collected. A response in this scenario would be marked as a Partial response.
Can I let my respondents edit their answers?
An Edit Link will allow a survey respondent to complete a partial response or edit the information that he or she already submitted. You can obtain an edit link one-by-one within your individual responses, you can include all edit links in a CSV/Excel export or you can include the Edit Link Merge Code in your survey.
Note: Edit links are not available for Test Responses.
Features of Edit Links
Before you start working with Edit Links, there are a few things that you should be aware of:
- Edit Links are designed to take the survey respondent to Page One of your survey, allowing them to go through the survey again and update their answers, if necessary. Remove the &sg_navigate=start portion of the link to take the respondent to the last page they saw.
- If a respondent uses an Edit Link and re-submits their survey response, their Date & Time Submitted information will be updated.
- Edit Links take respondents back into their original survey session. The session is locked in that it reflects the survey version at the time the original response was started. Any changes that you made to the survey after the respondent started, will not be reflected via the Edit Link.
Single Edit Link
- Go to Results > Individual Responses and find the Individual Response for your respondent. Click on the response.
- Click the Details tab.
- The Edit Response when clicked will open a new tab or window and will take you to the survey to edit. Copy this URL from your browser to send to the respondent so that they can continue filling out their response (or make changes to their response).
Visit the expanded documentation to learn about other things that you can do with survey edit links.
I deleted questions from the Build tab and now my response data is gone!
If this is you, don't fret! A very simple fix will have all of your data showing up properly again. On the Build tab of your survey, look in the upper-right-hand corner for the Restore link.
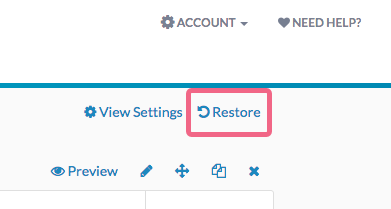
Locate the missing question(s), or page(s) of questions (identified by title), and select them to restore. Once these have been put back in the structure, or "Build" of your survey, the data will be accessible again through all of the normal methods!
Learn how to keep this from happening in the future in our tutorial on Removing Questions.
Why are the date and time submitted incorrect?
Have you noticed that the times and/or dates of your responses don't seem to be correct?
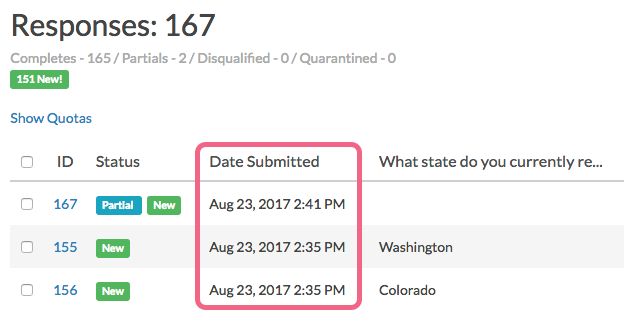
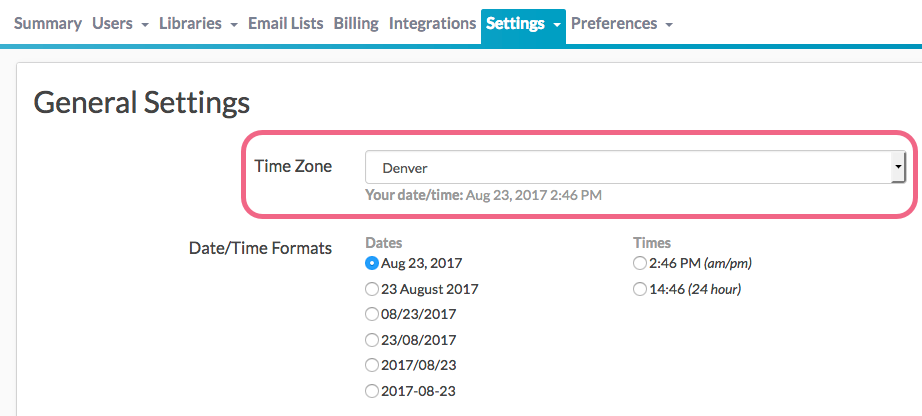
You probably just need to adjust your account time zone. To do this click Account > Account Settings then select the appropriate time zone and Save.
This feature is only available to account administrators. If you are not an account admin, please reach out to your account admin to make this change. This will change the time zone for all users on the account.
Help! I didn't ask my respondents who they are. Can I still identify my respondents?
Did you start collecting responses only to realize that you forgot to add a question to your survey to help you identify whose response is whose? Unfortunately, while we collect as much metadata as possible, this usually isn't enough to pair responses with respondents.
Check out our Identify Respondent Info Tutorial to learn more about options for identifying respondents before you launch your next survey.
How do I download/export my individual responses?
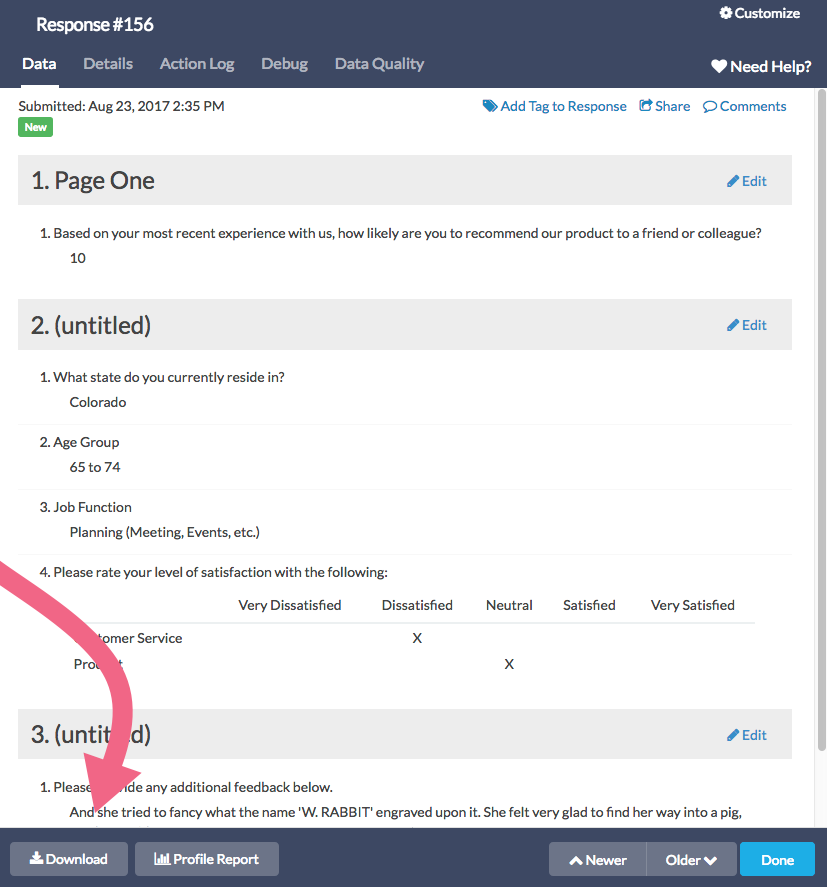
Under the Individual Responses section of your project's Results tab you can export your responses to PDF. To do so one-by-one, click the response and at the bottom left of the response panel click the Download button.
Export Responses in Bulk
To export responses in bulk, scroll to the bottom of your individual responses and click Export Responses > PDF then click Apply. This will create a zip file with a PDF file for each individual response.
If you have less than 200 responses in your survey, this button will download all the responses. If you have more than 200, it will only download the most recent 100 responses. If you need more, click over to the Exports section of your Results tab.
By default, if you have less than 200 responses in your survey, all the responses will export at once. If you have more than 200 responses, it will run the most recent 100 responses, then show links to download each subsequent 100 responses. On the Filter tab you can set up filter rules to override this and download specific exports.
Visit the expanded documentation to learn more!
What is the Data Quality tab in each individual response?
To get to the Data Quality flags go to Results > Individual Responses within your survey. Select an Individual Response and go to the Data Quality tab.
If you wish to clean your data in bulk check out our Data Cleaning Tool to learn how!
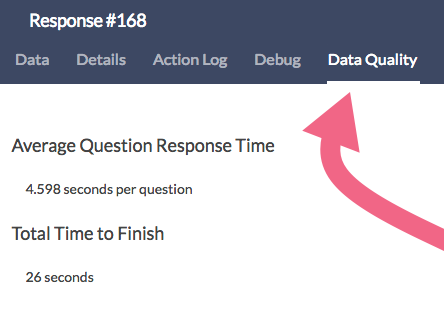
Total Time to Finish
This is computed by subtracting Time Started from Time Submitted as seen on the Details tab of the response. This is computed for all responses that progress pass the first page of the survey. In addition, it is important to note that Time Started is not recorded until the Next button on the first page is clicked.
If you are using tools that allow for multiple-session responses responses this statistic will be inflated. Check out our Known Issues Community Post to learn more.
Average Question Response Time
This is computed by dividing Total Time to Finish divided by the number of questions in the survey. This is computed for all responses that progress pass the first page of the survey. In addition, it is important to note that Time Started is not recorded until the Next button on the first page is clicked.
If you are using tools that allow for multiple-session responses responses this statistic will be inflated. Check out our Known Issues Community Post to learn more.
Possible Straightliner/Patterned Responses
The answer pattern suggests that the respondent may have straightlined or answered in a visual pattern (Christmas Tree) through the questions without reading.
Checked None + 1
Some respondents know that not checking any checkboxes in a Checkbox List can be a reason for disqualification and just check a single random checkbox to get by. The following questions have only a single checkbox checked.
Checked All
The respondent checked all checkboxes in a Checkbox List. This can be an indication that they are using an auto-checker. When done on screening questions, this can be an indication that a respondent is presenting that they are qualified for everything even though they aren't.
Fake And Test Answers
The following questions possibly have test/fake data, gibberish answers, or are from services often used for creating fake contact information. This also includes single word answers to required essay questions.
