Images uploaded via the File Upload question show up as links in the body of an email message from the Send Email action, as well as the optional PDF review file you can attach. If you'd like to see the actual image as part of the PDF review, follow these steps!
One note: the greater the time between when the image is uploaded and when the Send Email action fires will ensure that the file has made it to the Amazon cloud where our images are stored. Ideally, your File Upload question is near the beginning of a survey and your Send Email action is on the Thank You page with at least a page or two in between.
- You will need a survey with a File Upload question to get started. The File Upload Security setting must be disabled for this scenario.
- The link for all files uploaded to your account will have the same URL base:
http://surveygizmoresponseuploads.s3.amazonaws.com/fileuploads/AccountID/SurveyID/Filename
- You will need to replace the three bolded pieces of the above URL. You can find your account ID by clicking Account > Summary > Account Overview. This will only be accessible by Account Administrators.
 The survey ID is located in the URL bar when you're building the survey.
 Now you're ready to build the link to be placed in a Text / Instruction Element.
 - The last piece of the link is a merge code for the name of the uploaded file. On a page that follows the File Upload question, add a Text / Instruction Element. The text element should be the only item on the page.
- You will see Merge Code button on the text element tool bar.
- Give that a click and then select the File Upload question from the merge code menu then click Insert corresponding to the Question Answer. You will get a merge code similar to this one:
[question("value"), id="5"].
- Now all you need to do is put it all together into an image link with your Account ID, Survey ID and merge code for the File Upload question. Once you've constructed your image link put the link in the Source of the text element you just created.
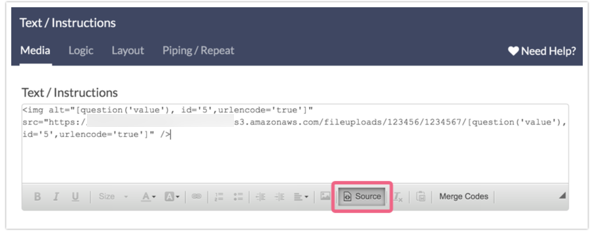
<img alt="[question('value'), id='41',urlencode='true']" src="https://surveygizmoresponseuploads.s3.amazonaws.com/fileuploads/544855/5554754/[question('value'), id='41',urlencode='true']" width="300"/> - Make sure to Save your text element once you have included the link.
- Next, edit the page that the text element was added to. On the page Logic tab, locate the Automatically submit the page, running all actions and custom scripts setting. Toggle this setting to Yes. This will ensure that the text element that you added above is not actually displayed to survey respondents during survey taking.
- Once that step is complete, you can build out the rest of your survey as usual. Once you get to the Thank You page, add a Send Email action. In the action, click the Advanced tab and select the Attach a PDF Review option and then make sure the Include text elements setting is selected as well.

- Once all that is done, try taking your survey to see how it works!
 The survey ID is located in the URL bar when you're building the survey.
 Now you're ready to build the link to be placed in a

Include an Image Element from Your Survey in PDFs
Image media elements are not available to include in PDFs. You'll want to instead use a Text/Instructions element. Here's how:
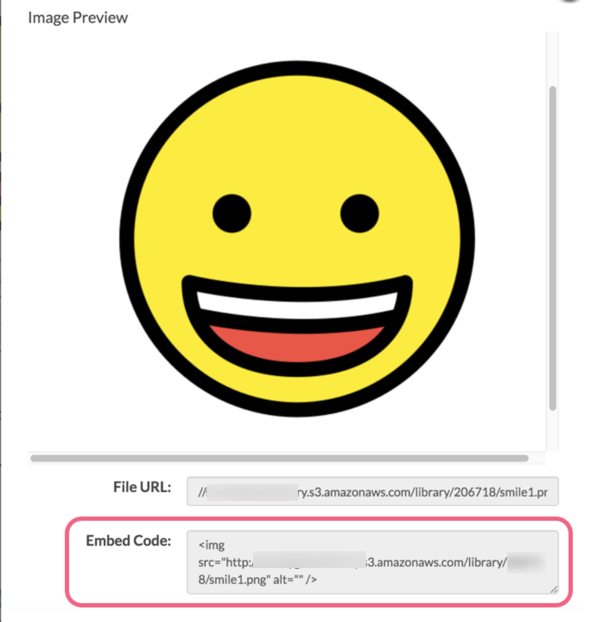
- Go Account > Libraries > File Library and find the image you wish to include in your PDF.
- Click Edit on the image in question and copy the Embed Code to your clipboard.
- Next, go back to your home page by clicking the Home icon. Find your survey and go to the Build tab. Just above or below your image element (it doesn't matter which as we're going to delete the image momentarily) click to insert Text/Media.
 Instead of an image element we are going to keep the default selection of Text/Instructions. Enter some temporary text (we'll replace this in a moment) and click Save Text/Media and Edit.
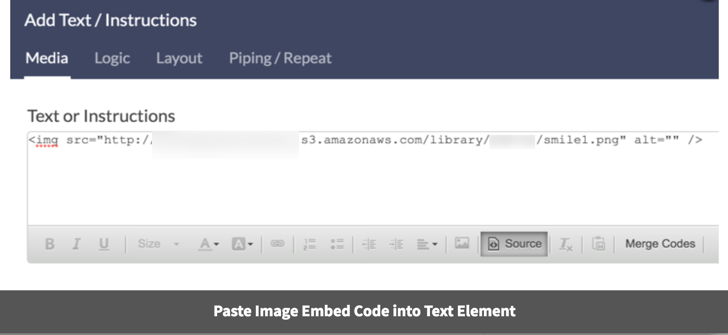
 - Next, access the source code of your text element by clicking the ... icon followed by Source. Replace your temporary text with the image embed code from your clipboard and click Save Text/Media.
- Next, delete the duplicate image element from your survey. Make sure you are deleting the Image element and not the Text/Instructions that you just added!
- Finally, when downloading PDFs, be it Individual Response, Review Action, or Send Email PDFs, be sure to select the option to Include text/instruction from survey.

 Instead of an image element we are going to keep the default selection of Text/Instructions. Enter some temporary text (we'll replace this in a moment) and click Save Text/Media and Edit.
Image Size
If you find that your image is too big or altogether not an ideal size, you can add width and height parameters to the image embed code:
<img src="http://surveygizmolibrary.s3.amazonaws.com/library/12345/smile.png" height="100" width="100" />Replace the values associated with the height and width parameters to adjust your image size.
— Tawnee on 09/14/2015
@Jaydee: Hey there! Thanks for checking out our documentation. This right now is not a feature, but a creative work around our customers have used to get those images across. One thing you can try to get this to work is adding a time delay on your email action of at least 20 minutes or longer. That has lead to success for some of our users. Also, our Development is looking at this as well to see what else can be done on our end to help this process along. I just wanted to provide some clarification. I appreciate you asking questions! :)
As always, we are happy to be of service. Have a rocking' day!
Tawnee Torres
Your Rockabilly Rebel support hero :-)
— Jaydee Devine on 09/14/2015
Any idea when this will be fixed? We would really love to utilize this feature!