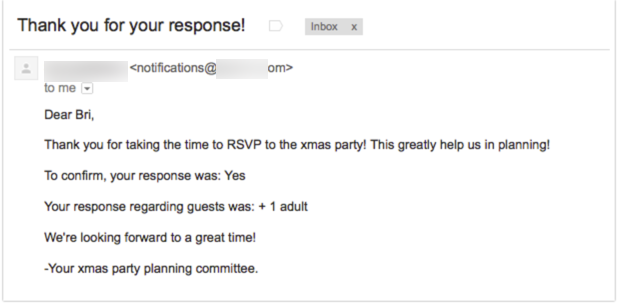
Sending thank you messages to your survey respondents to thank them for their time is a excellent survey best practice. Thank you messages are most commonly set up as part of an email campaign, however these messages do not allow you to pull content from your survey. Never fear! We have a solution!
The send email action autoresponder allows you to pull information from the answers the respondent provided in the survey to personalize and/or send confirmation details as part of your thank you message. In this tutorial we'll cover how to use an email autoresponder instead of an email campaign thank you message.
If you already added a thank you message to your email campaign you'll want to copy any text you wish to keep and delete the thank you message.
Next, head over to your Build tab. We're going to start by pulling the contact details necessary for sending the thank you email from the email campaign. Alternatively, if you are not using an email campaign you'll need to collect these details by asking the questions in the survey.
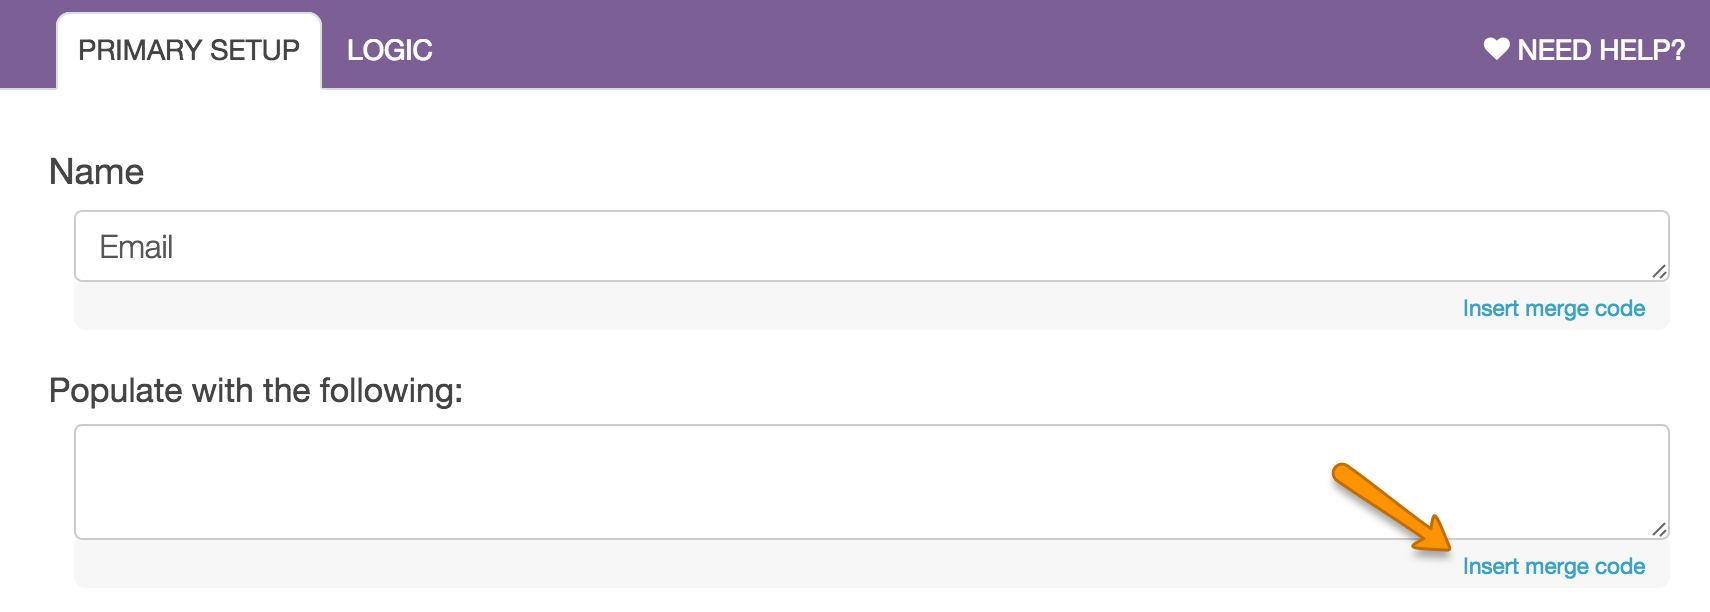
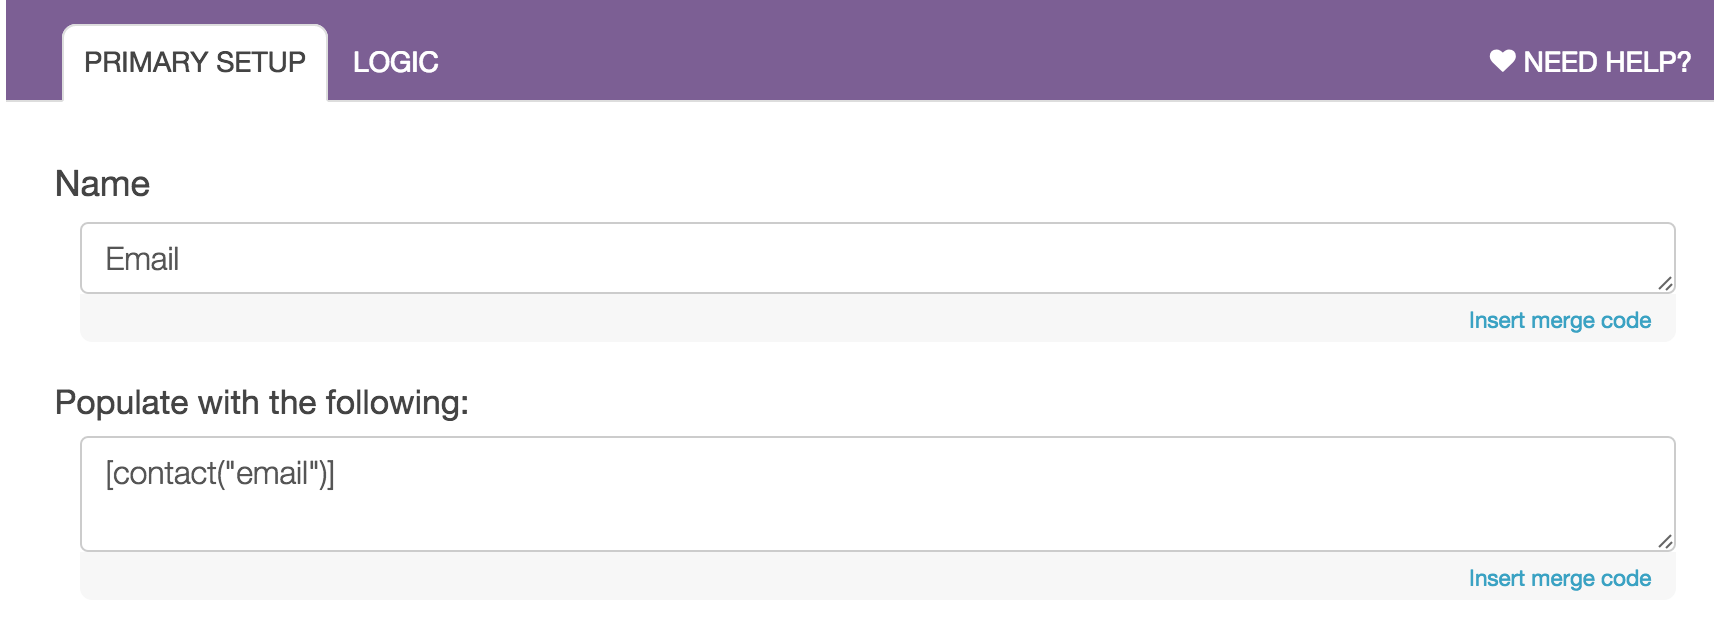
To get started storing the details from the email campaign, click the Action link on the first page of the survey and select Hidden Value. Next, give your action a name. In this example we'll start with "Email" as this is the bare minimum that you'll need to pull over to send an email address. Click the Insert merge code link below the Populate with the following field to access the merge code helper.
From the list you'll want to select the Email field under the Email Invite Variables. Once selected, click the Insert button to insert the merge code and click Save Action. This field will now dynamically populate with the email address for each response. We'll use this later to set up a Send Email action.
Repeat this process for any other contact details you wish to use in your thank you message, e.g., First Name and/or Last Name.
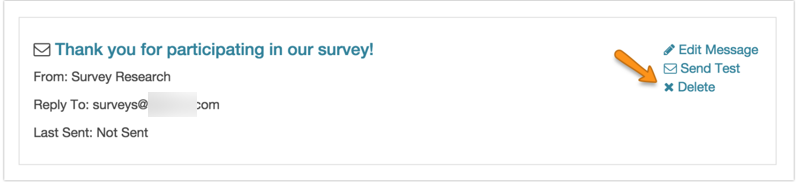
Next, scroll to the Thank You page of the survey. Click the Action link at the bottom of the page to add a new action. Select Send Email and give your action an internal name then click Save Action and Edit.
Start customizing your send email action by customizing the Recipient Email Address. You'll need to pull the merge code for the hidden value you created that stores the email address. To do this, click the Survey Taker link just below the Recipient Email Address field.

In the Email Address dropdown find your Hidden Value for Email. If you created hidden value fields for First and/or Last Name you can select these in the dropdowns below as well.

Click Save when you are finished. Your Receipient Email Address and Recipient Name fields will now be populated with merge codes that will dynamically populate with the email address for each response.
If you wish, you can customize the Senders Email Address and Senders Name to your email address or another more personalized email address and name.
Next, customize the Email Subject for your thank you message.

Delete the default text from the Message Body field and add your personalized thank you message text. To use answers from the respondent's survey response, click the Insert merge code link below the body field to access the merge code helper. If you wish to create a formatted message click the HTML Version link and then click the HTML Editor to load an editor for text formatting.

If you wish, add a custom Reply To Email Address and Reply To Name and any BCC email address you wish to send your thank you message to.
Finally, on the Advanced tab you can take advantage of the Time delay. By default, the Send Email action fires upon completion of the survey. Using a time delay will make your response seem more personal and less automated. You can specify +10 hours, +23 minutes, +30 days or even +2 years! If you are looking to send an email after a certain date, use the logic builder on the Logic tab.