Returning respondent to a later page in the same survey is a really common survey practice. An example might be a survey that initially collects some baseline data. Then, at a later date, you wish to collect follow-up information after some treatment has been applied. By returning the survey respondent to a later page in the same survey you'll have all of the data for that respondent in the same place!
While it's a little difficult to figure this out on your own, it's pretty easy to set up! In this tutorial, we'll show you how.
Start by building out your baseline survey, or, the survey questions you wish to have the survey respondents answer first. Add a page following your baseline survey questions that will work like a thank you page for this initial part of the response.
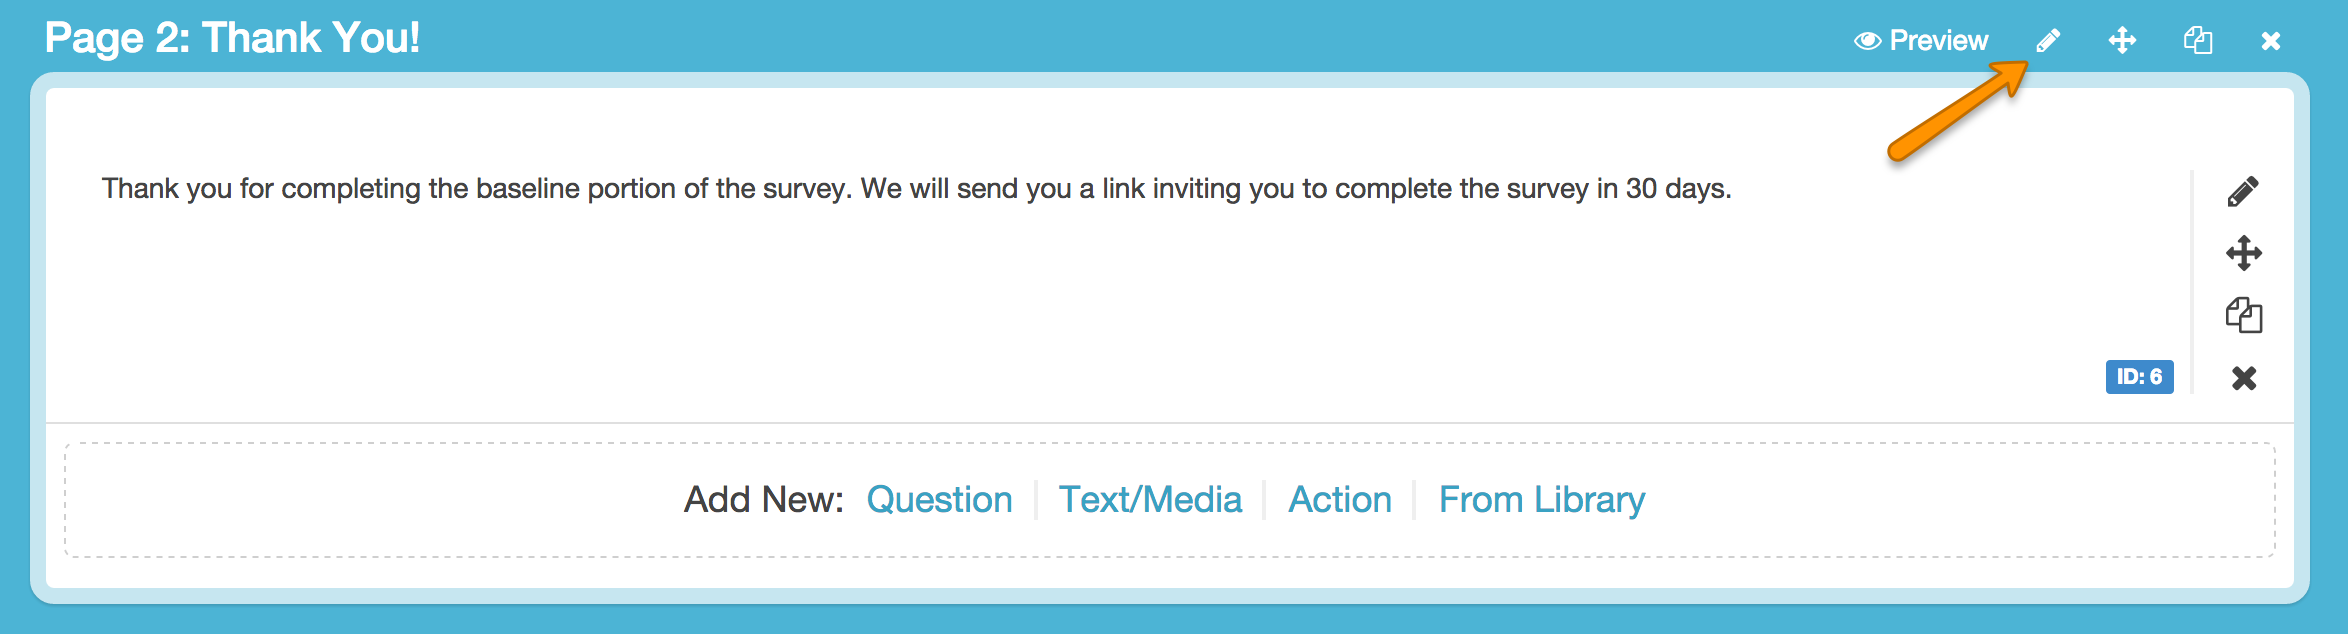
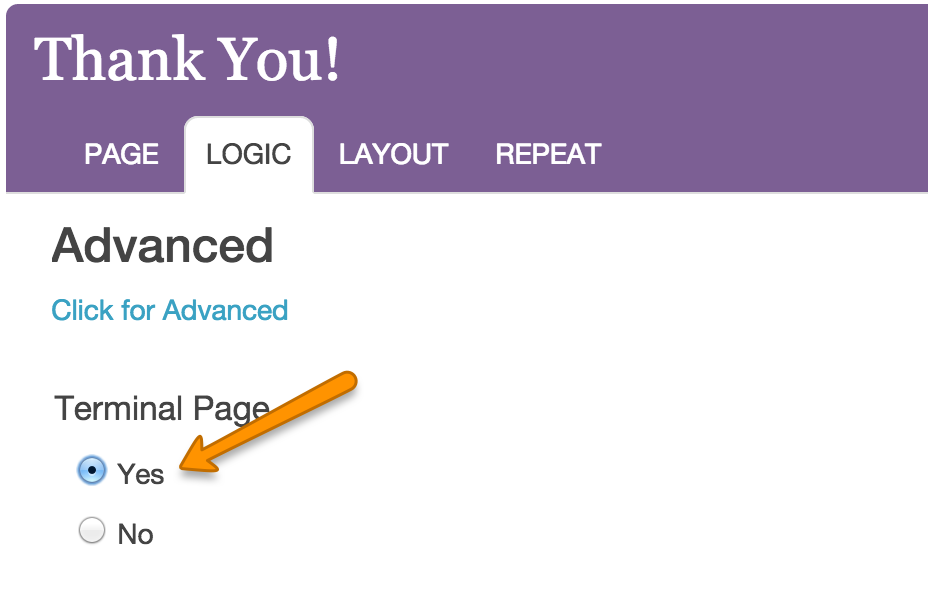
To make this work as a thank you page, you'll need to set this up as a terminal page. To do so click, the pencil icon to edit the page and go to the Logic tab. Under Terminal Page select Yes. When survey respondents reach this page it will appear as if they are done with the survey for now.
You might also need to check the option to Change response status to "Partial" under the Override response status options on the Page tab. This will keep the response marked as partial until the respondents reach the final Thank You page in your survey.
Continue building the follow-up or treatment portion of the survey on the pages following your baseline terminal page.
Now you're ready to decide how you want to return respondents to the survey. You can set up a delayed send email action with a survey link that navigates to the specified page. Or, if you are using an email campaign, you can set up a reminder to send out that will navigate the respondent to the specified page. Third, you can manually construct and manually email out survey edit links that navigate to the specified page. Or, finally, you can use the SurveyGizmo Unique Identifier (sguid).
Option 1: Use a Delayed Send Email Action to Return Respondents to the Survey
Setting up a delayed send email action to return respondents to the survey is a pretty nifty way to accomplish your goal. To get started, on your baseline thank you page, click the Action link and select Send Email from the menu. Give your action an internal title and click Save Action and Edit.
Customize the Recipient Email, Recipient Name, Senders Email, Senders Name and Email Subject. In the Message Body, delete the default text and add your personalized text inviting the survey respondent to return to the survey. As part of the message body, you'll need to add the edit link merge code. To do so, click the Insert merge code link to the lower-left corner of the message body and select Edit Link under the Advanced section of the dropdown menu. Click the Insert button to insert at your cursor.
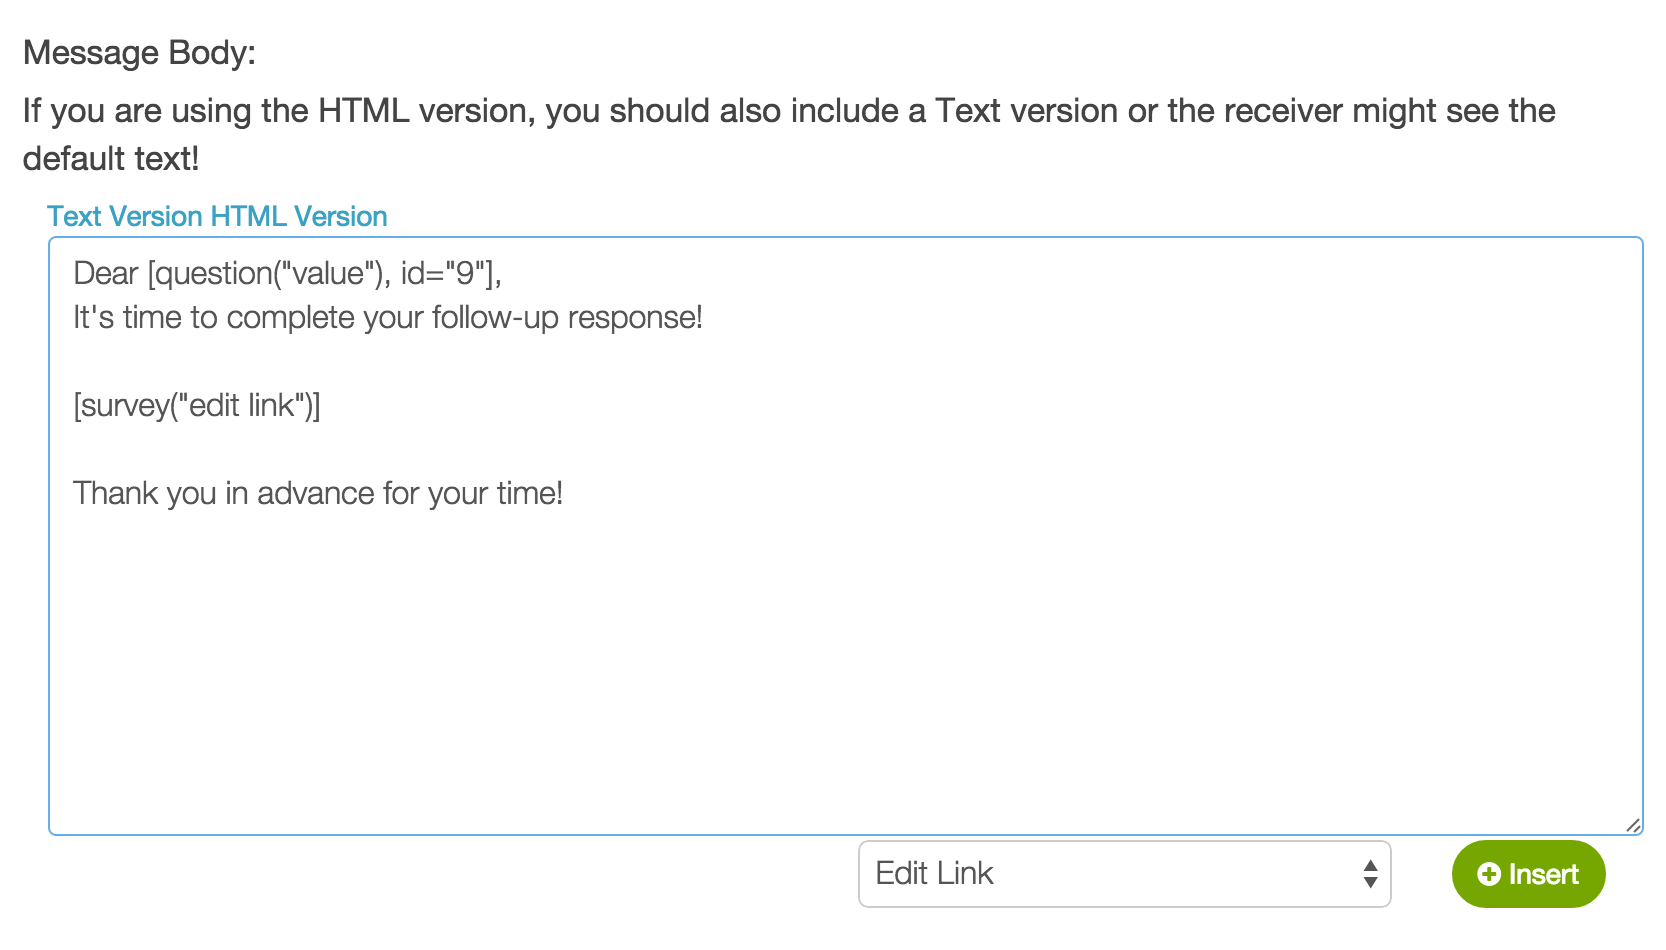
Now you will need to add a URL variable to the end of the edit link that will navigate the respondent to the proper page. Before you can do so, you'll need to get the ID or SKU for the page you wish the survey respondent to land when returning to the survey. Check out our How to Find ID Numbers Tutorial to learn how!
With your page ID, you'll add the __sgtarget variable to the end of your edit link merge code starting with an ampersand, 2 underscores, and sgtarget=ID. The result should look like this:
[survey("edit link")]&__sgtarget=4
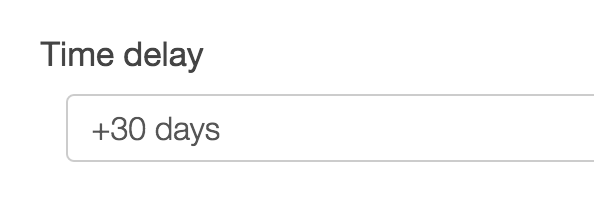
When you are finished go to the Advanced tab and in the Time delay field enter the time delay you wish to use. This will be the amount of time you wish to elapse before inviting the survey respondent to return to the follow-up portion of the survey. This could be +30 days, +2 months, etc.
Click Save Action when you are finished!
Option 2: Use an Email Campaign Reminder to Return Respondents to the Survey
If you are using an email campaign to invite survey respondents to participate in your survey, you can modify the link in a reminder message to navigate to a specified page.
Before we get started modifying the message we'll need to make a slight modification to the basic setup above. For all terminal pages that you set up you'll need to edit those pages and use the option to Change response status to "Partial" under the Override response status when this page is reached options. Doing so will ensure that your contacts are eligible for the reminder we are going to set up.
Next, we'll want to create a reminder message. To get started, go to the Campaign Designer step of your Email Campaign and add a reminder. Customize the subject and message inviting the survey respondent to return to the survey.
Next, we're going to add a URL Variable that will navigate the respondent to the proper page. Before you can do so, you'll need to get the ID or SKU for the page you wish the survey respondent to land when returning to the survey. Check out our How to Find ID Numbers Tutorial to learn how!
With your page ID, you'll add the __sgtarget URL variable plus the page ID under your Email Campaigns Advanced Settings in the URL Variable field. The result should look like this:

Then just send out your reminder when you are ready. When recipients click the link they will be sent to the page you specified in the URL Variable.
Option 3: Manually Construct a Survey Edit Link to Return Respondents to the Survey
If you only need to return respondents to a specific survey page on a one-off basis, you can grab the edit link on a one-by-one basis within each response. Or, if you are using another system to send out emails inviting respondents to return to the survey, you can export all your edit links at once. Below are the steps do either grab a single edit link or export all edit links. You will need to make a small customization to these links, which we discuss below, in order to navigate the survey respondent to the correct page.
Single Edit Link
- Go to Responses tab and find the Individual Response for your respondent. Click on the response.
- Click the Details tab.
- The Edit Survey Response, when clicked, will open a new tab or window and will take you to the survey to edit. Copy this URL from your browser. In the next step, we will discuss modifying this link to navigate to the correct page.
Export All Edit Links
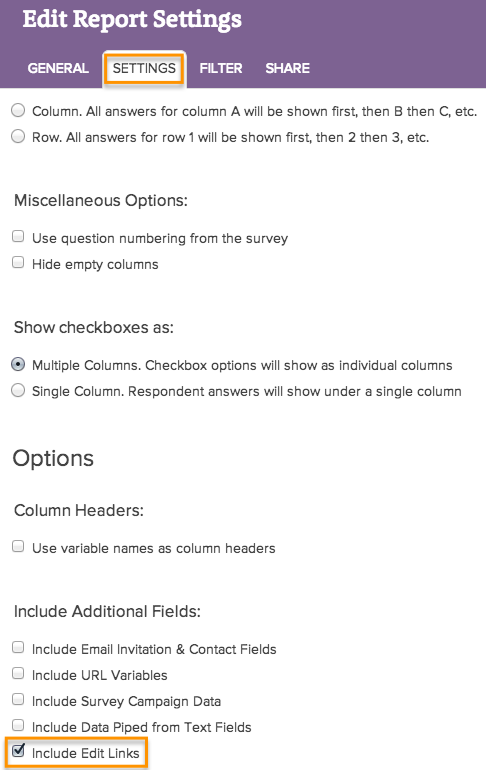
- Click on the Report tab and click CSV/Excel to create a new export (this will not work with the Quick CSV option).
- Create Export and then click on the Settings tab. Scroll down to the bottom and select the option to Include Edit Links.
- Save and Run Report!
Once you download the export, you'll see Edit Links as the column just before your first survey question:

For each link, you'll need to add a URL variable to the end of the edit link that will navigate the respondent to the proper page. Before you can do so, you'll need to get the ID or SKU for the page you wish the survey respondent to land when returning to the survey. Check out our How to Find ID Numbers Tutorial to learn how!
With your page ID, you'll add the __sgtarget variable to the end of your edit link merge code starting with an ampersand, 2 underscores, and sgtarget=ID. The result should look like this:
http://www.example.com/s3/survey/1903419/30M56B39D08I38YLNK23339OI5LSO7?snc=1416594540_546f846ce8a478.86511872&sg_navigate=start&_iseditlink=true&__sgtarget=4
Next, just distribute this new edit link to your respondent/s!
Option 4: Use the SurveyGizmo Unique Identifier (sguid)
The SurveyGizmo Unique Identifier, commonly referred to as sguid, is a URL Variable that has some special properties that allow you to set up some pretty cool stuff in your surveys. SurveyGizmo recognizes this variable and will store it as a unique identifier. This is actually the key to returning Email Campaign survey respondents to the same response when they click the link a second time. The cool thing is that you can take advantage of sguid even if you aren't using an Email Campaign to send out your survey.
Implementing sguid in your survey can be a simple as just manually adding it to the end of the survey link for each survey respondent like so:
Respondent ABC Survey Link: http://www.example.com/s3/2280453/survey?sguid=abc
Respondent DEF Survey Link: http://www.example.com/s3/2280453/survey?sguid=def
You can also get pretty advanced by setting up a gateway survey in which respondents set up their own sguid. Check out our Pre-Test and Post-Test Survey Tutorial to learn more!
You'll probably also want to brush up on sguid in our SGUID Tutorial as well!
Admin
— Bri Hillmer on 04/04/2016
@Dante: You are correct! It looks like I missed a critical step for this to work for email campaigns. You'll need to also use the response status override option to mark the status as partial. I added this to the second option as well as the initial setup. Good catch!
Let me know if you have questions!
Bri
Documentation Coordinator/Survey Sorceress
SurveyGizmo Customer Support
— Dante on 04/04/2016
Hi! Just wanted to point out that "option 2" (campaing reminder) will not work because the example uses a terminal page. When users get to that page the response is marked complete and because of that the reminder will not get that users.
Admin
— Bri Hillmer on 12/12/2015
@Alyce: How embarrassing! Thank you for letting me know and for reading so carefully! I completed the sentence.
Bri
Documentation Coordinator/Survey Sorceress
SurveyGizmo Customer Support
— Admin on 12/11/2015
Option #2's description has been cut off:
"Then just send out your reminder when you are ready. When recipients click the link they will be sent to t
Option 3: Manually Construct a Survey Edit Link to Return Respondents to the Survey"