You can trigger a Salesforce Marketing Cloud email using your regular Salesforce Marketing Cloud integration action. After setting up your triggered emails in Salesforce Marketing Cloud you just need to setup your SurveyGizmo Salesforce Marketing Cloud action, and voila - every time that Salesforce Marketing Cloud action is triggered, an email will be sent from your Salesforce Marketing Cloud account!
The possibilities are endless. Let's say you have a customer satisfaction survey, and you'd like to be able to email your customers to find out what went wrong when you receive a negative review. Well, if you set up your Salesforce Marketing Cloud action to only trigger when you've received a negative response, and then have that trigger an email in Salesforce Marketing Cloud to follow up with them, that not only allows you to keep in touch with your customers on how to improve, but allows you to track that email within Salesforce Marketing Cloud. It also means you have a lot more customization options inside of Salesforce Marketing Cloud with how the email will look.
Setting up your Salesforce Marketing Cloud Trigger Sends
1. Once you're logged in to your Salesforce Marketing Cloud account, click the Interactions tab.

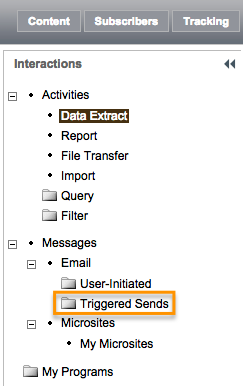
2. Under the Interactions column, click on the Triggered Sends option.
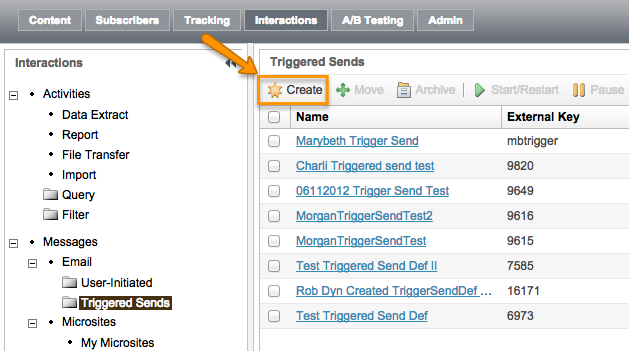
Now, you'll need to create a new triggered email:
3. Click Create.
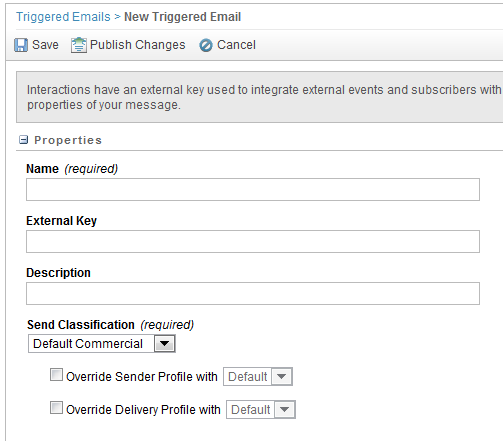
4. Customize your email and be sure to customize your External Key as you'll need to use it later when customizing your survey.
NOTE: Please remember to scroll down, there are several other options to be filled in in this particular section.
5. Save your work.
6. Go back to Interactions > Triggered Sends.
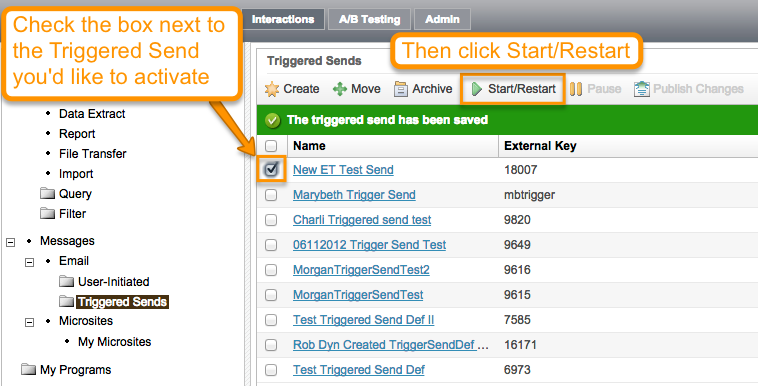
7. Click the checkbox next to the triggered send you'd like to activate and click Start/Restart.
Setting up your SurveyGizmo Salesforce Marketing Cloud action
Now that you've set up your Salesforce Marketing Cloud Trigger Send, head on back to SurveyGizmo to set up your Salesforce Marketing Cloud action.
1. Click Add Action on the bottom of the page where you'd like to add your Salesforce Marketing Cloud action.
2. Select SF Marketing Cloud - Push.
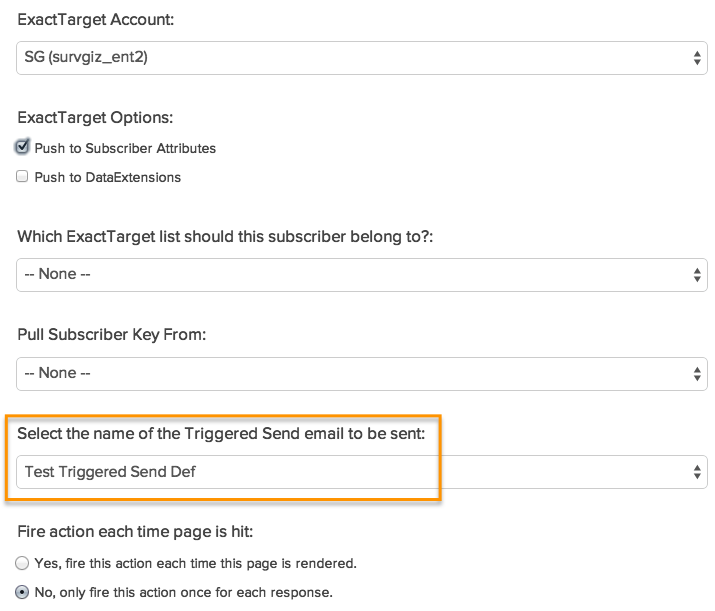
3. Choose your Salesforce Marketing Cloud Account from the dropdown menu.
4. Select Push to Subscriber Attributes.
5. Choose which Salesforce Marketing Cloud list this subscriber should belong to. This field is required and you can only select one list at a time.
7. Choose which Subscriber Key to Pull from. If you are using multiple Salesforce Marketing Cloud accounts (and using the subscriber key option) you'll need to fill in this option as well.
8. Select the name of the Triggered Send email to be sent. Be sure to choose your pre-set up triggered send email. This will trigger an Salesforce Marketing Cloud email once someone hits this part of your survey.
9. Once you're done, make sure to Save Action. 