Webhooks allow you to communicate with external webpages via the HTTP POST or HTTP GET standards. You can use the Webhook Action to pull data into a survey response and/or send survey response data to your external database.
If you are looking to use Webhooks to send account-level updates (e.g. survey creation, survey update, survey publish, and/or survey close notifications as response received notifications) visit our Account Webhooks documentation.
Setup
The Webhook action can be added to any page of your survey, except the first page. To add a Webhook click the Action link on one of your survey pages and select Webhook.
- Choose your Method, Post or Get.
- The default method is via HTTP POST as it supports larger amounts of data to be transmitted.
- The HTTP GET method is also available if the API or webpage requires the data via this method.
- Specify your URL and protocol.
- The connection can be sent through normal http or through a secure https URL.
- Use the Select a Merge Code link to insert a merge code into the URL field. This will allow you to dynamically update the request url with information pulled in from the survey, if needed.

- Under Fields To Pass you can choose to Post the current response data (the entire response) or Post custom fields (a specific selection of questions/fields from the survey).
- Post the current response data will send information that is contained within the Survey Response Sub Object. By default this information will be sent as post variables, if you wish to change this to send response data in JSON format select this option.
Note: Using the Post the current survey response data option, the response data will be available under the POST 'response' key. See examples.
- Post custom fields will allow you to specify the questions/fields you wish to send as post variables. To set this up specify the following:
- Question to Send - Choose a field from your survey in the Question to Send dropdown menu and click Add Field.
- Variable Name - Specify a variable name (required)
- Default Value (optional) - Specify the default value (in case the survey field does not contain any value).

- Post the current response data will send information that is contained within the Survey Response Sub Object. By default this information will be sent as post variables, if you wish to change this to send response data in JSON format select this option.
- Use the Custom Headers section to define custom HTTP headers that will be passed along with your request.
- As with the above Fields to Pass, you can reference a Question to Send and provide a Variable Name for your custom headers. An optional Default Value field is available, too.
- You also have the option to send a Static Value, if needed.

- Indicate when to Run this action.
- By default, the Webhook runs when the page is displayed.
- It can be triggered when the page is submitted (this includes when the Back, Next and Submit buttons are clicked).
- This option is only compatible with the POST and cannot display or prepopulate questions in the survey.
- If you have placed your Webhook Action on your survey's Thank You page (or another terminal page), do not use this option. Instead, set the action to run when the page is displayed.
- Asynchronous Connect - This will asynchronously process the connections; this is a queue for connections. When this option is toggled to Yes, the action will retry if it fails which will prevent surveys from loading slowly. This option is only compatible with the POST and cannot display or prepopulate questions in the survey.
Asynchronous webhooks will retry up to 10 times. The amount of time in between each attempt to refire is (times it's been retried in seconds)^2.
- Indicate What do you want to do with the data/content returned from the URL.
- This option is only relevant to the GET.
- By default, Nothing will be displayed, however, you can choose to Display it as a basic HTML page, or Use it to pre-populate questions that you specify, discussed in the following section.
- If you need to execute your webhook between each survey page, navigate to the Logic tab and check the Run action between every page setting.


Prepopulate Questions with HTTP GET Results
This method requires the webpage to display a query string directly as the output of the webpage i.e. userid=12345&fname=Bob.
Please note that the displayed query string does not begin with a ? within the webpage output.

This is interpreted by SurveyGizmo and can be used to prepopulate fields in the survey by choosing the field, clicking Add Field, and specifying the variable name (in the Field Name column) as defined in the webpage's displayed output.

Logic
If you need to execute your webhook after each survey page, navigate to the Logic tab and check the Run action between every page setting.
Here, you can also apply logic to trigger your Webhook Action based on answers to previous questions.
Testing your Webhook
There are a number of third-party tools available for testing your Webhook, including Webhook Tester and Mockbin . We have highlighted using Webhook Tester below.
- Go to the following link: https://webhook.site/#/.
- A unique URL will be automatically generated for you when you enter the site. Click the copy button to the upper right to copy your unique testing URL to your clipboard. Note: Do not use the link in the image, it is a unique link that was created for our particular instance, it will not work for you.

- Go back to your survey, and create or edit your Webhook action.
- Paste your unique Webhook Tester URL in the Webhook action.
- Save your action and record a survey response.
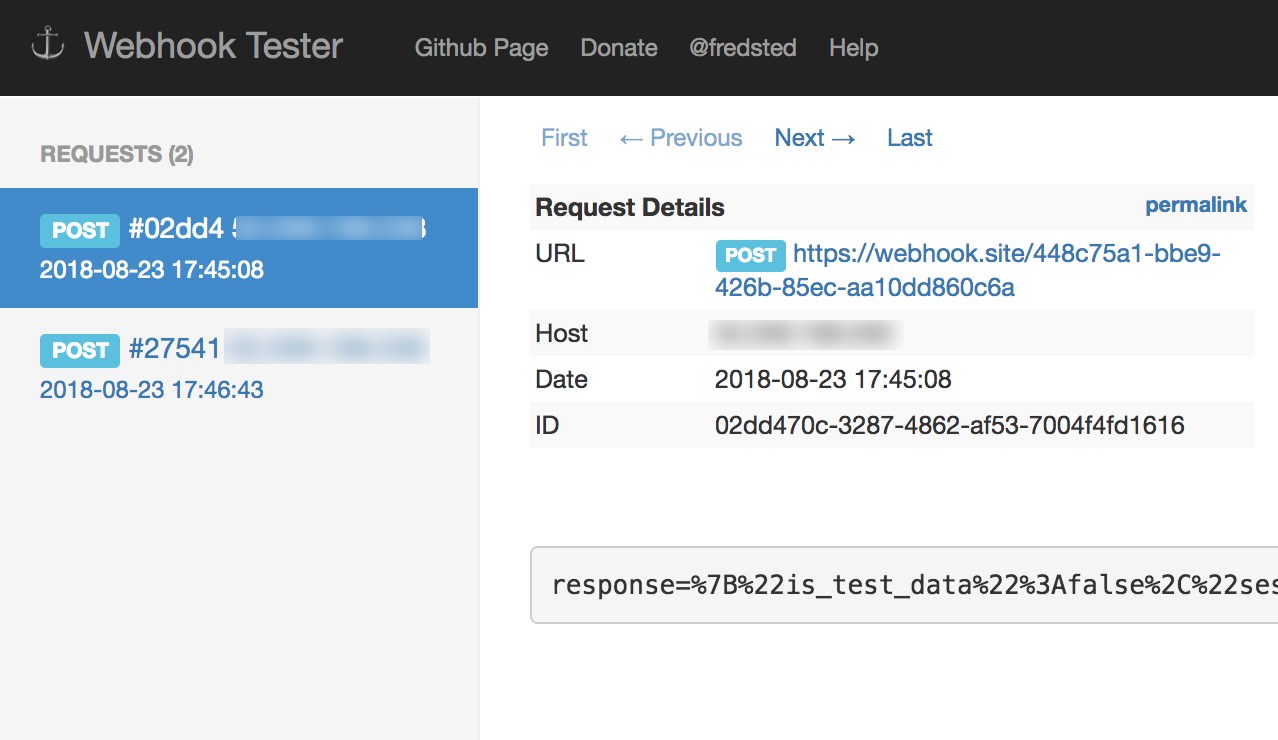
- To view the results that get posted, return to Webhook Tester. Each time a new response is submitted it will appear in your request list in the left menu. Click it review the request details.


HTTP Post Results in Exports
HTTP Post results are included in exports by default. This will contain the results of the action for each response.
Webhook Limitations
- Piped fields cannot be passed.
- There is a cap of 200 fields for the post custom fields POST option. If you'd like to have your cap increased contact support. Alternatively, you can use the post the current response data which will post the entire response either as post variables or JSON. There's no real limit on how many fields you can pull using the get method!
- Webhooks cannot be added to the first page of a survey.
- Webhooks will only run every 10 seconds. If your respondent clicks back and next quickly within 10 seconds the webhook will not resubmit.
FAQ
Can I use a custom port?
No. We use port 80 for HTTP and port 443 for HTTPS. Please do not use a custom port because it will cause the action to become inoperable.
What content type is used to post the data?
The Webhook passes data in Content-Type: application/x-www-form-urlencoded.
Can I see an example of the Post current response data option?
Here is an example of the JSON response data:
[response] =>{
	"is_test_data": false,
	"session_id": "1487806491_58ae201be29097.19130318",
	"language": "English",
	"date_started": "2017-02-22 18:35:02 EST",
	"link_id": "123456",
	"url_variables": {
		"name": "jane"
	},
	"ip_address": "10.142.0.130",
	"referer": "http://www.surveygizmo.com/s3/1234567/Webhook-Survey",
	"user_agent": "Mozilla/5.0 (Macintosh; Intel Mac OS X 10_11_6) AppleWebKit/537.36 (KHTML, like Gecko) Chrome/56.0.2924.87 Safari/537.36",
	"response_time": 0,
	"data_quality": [],
	"survey_data": {
		"5": {
			"id": 5,
			"type": "RADIO",
			"question": "Gender",
			"section_id": 1,
			"answer": "male",
			"answer_id": 10001,
			"shown": true
		}
	}
}
Admin
— Dave Domagalski on 09/23/2019
@Chelsea: Thank you for your feedback!
I will note this with our Product team as well and include the information about the survey ID.
Thank you!
David
Technical Writer
SurveyGizmo Learning & Development
— AViD on 09/22/2019
@Dave: I would like to echo the comment/request @Luke made. Responding with the response-id (or providing a way to add it to the WebHook payload) would be very useful. It would be useful to respond with the survey-id as well.
Admin
— Dave Domagalski on 08/21/2019
@Luke: Thank you for your note!
I will share this feedback with our Product team as a potential future enhancement.
Thank you for taking the time to share this with us!
Best regards,
David
Technical Writer
SurveyGizmo Learning & Development
— Luke on 08/21/2019
It would be useful to respond with the response id (rid) as well