We always recommend sending a test of each message in your Email Campaign to ensure proper formatting before sending out to your full contact list. You will want to do so this after you've customized your messages.
- On the Campaign Designer step of your Email Campaign, you will have an option to test each message you set up. To test your message click the Test button for the message you wish to test.

- Enter the email address(es) you wish to send a test to and click Send Test Email.
- You can send test messages to 20 contacts at a time (one per line). We recommend adding a couple colleagues or project stakeholders to test as well.
- The more email clients (Outlook, Gmail, etc.) you use to test your message formatting the better!


It is important to note that the test send is designed to review the formatting of the messages only. There are several email campaign features that will not be tested in a test invite, including:
If you wish to test these features, we recommend following the below steps for creating an internal test campaign.
Test emails will not display custom email properties.
Once you're done testing and everything is good to go, it's the moment of truth! Navigate to the Send Campaign step and click the Send Now button to send out your messages right away. If you prefer to schedule it to go out at a specific date and time, click the Not Scheduled link to set this up.

Responses Collected via Test Invites
Any responses collected via test invite messages will be marked as Test data.

Test data will be included in your reports and exports by default so that you can easily check your reports and exports as part of your full survey testing plan. Test data can later be filtered out on the Filter tab of your reports and exports.
Contact Merge Codes in Test Invites
If you are using contact merge codes to dynamically populate your messages or survey with personalized information, these will not work in test messages, nor will they populate inside of the survey.
- In the messages, any merge codes present will populate with the below dummy data.
- In surveys, the merge codes will be blank.
If you wish to test the use of merge codes, we recommend following the below steps for creating an internal test campaign.
| Contact Field Merge Code | Test Data |
|---|---|
| [contact("first name")] | John |
| [contact("last name")] | Smith |
| [contact("organization")] | ABC Company |
| [contact("division")] | North American Division |
| [contact("department")] | Marketing |
| [contact("team")] | Research |
| [contact("group")] | Designer |
| [contact("role")] | Employee |
| [contact("home phone")] | 123-123-1234 |
| [contact("fax")] | 123-123-5643 |
| [contact("work phone")] | 789-456-1234 |
| [contact("street")] | 4888 Pearl East Circle |
| [contact("suite")] | Suite 300W |
| [contact("city")] | Boulder |
| [contact("region")] | CO |
| [contact("country")] | blank |
| [contact("postal")] | 80301 |
| [contact("job title")] | Manager |
| [contact("website")] | www.surveygizmo.com |
| [invite("custom 1-10")] | Custom Field 1-10 data |
| [contact("customfieldname")] | The merge code will display for all custom contact fields |
Unsubscribe Links in Test Messages
The unsubscribe link at the bottom of test emails sent from this area will not unsubscribe the contact and will take you to a page that doesn't show the unsubscribe message. If you wish to test unsubscribe links, we recommend following the below steps for creating an internal test campaign.
Create an Internal Test Campaign
In order to test the use of contact merge codes in either your email campaign message or in the survey itself (as well as the unsubscribe link), you will need to create a separate internal test campaign. This will allow you to test the full suite of email campaign features.
- To do so, create a copy of your campaign.

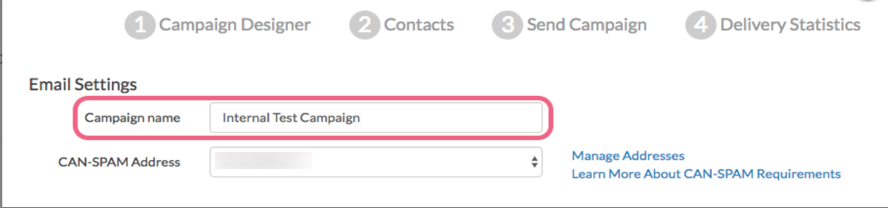
- Be sure to go to the Advanced Settings tab of your new campaign to give your campaign a name that indicates that it is a test campaign.


Your copied campaign will copy all of your messages and settings but will not copy the contacts.
- Go to the Contacts step of your internal test campaign.
- To complete a full test of your email campaign you'll want to add yourself and any other testers as contacts with data in all of the contact fields that you are using in the message and the survey. Click Add Contacts and select Manually Enter a Single Contact; this is the quickest way to add a contact for testing purposes. Populate all the contact fields you wish to test and click Add Contact when you are finished.
- We recommend adding a couple of other colleagues or project stakeholders to the test as well; the more email clients you use to test your message formatting, the better!
- When you are finished adding your test contacts, head over to the Send Campaign step and click the Send Now button instead of the Test button to send a live campaign to test the full suite of email campaign features!
Please note, responses collected via this method will NOT be marked as Test. You will have a couple of options for dealing with these responses.
- Before sending out your live campaign you can go to Results > Individual Responses to delete each test response.
- In both reports and exports on the Filter tab, you can take advantage of the filter By Campaign option to filter out responses from your internal test campaign.
Note: When sending a test link of an email campaign, the test email does NOT adhere to SPF/DKIM records. Any test sends from your email campaigns will come from SurveyGizmo. We suggest sending a live campaign to test SPF/DKIM.

Admin
— Bri Hillmer on 08/26/2016
@Youssef: Thank you for following up; my last response wasn't all that helpful was it?
What you would need to do is set up multiple campaigns and schedule them to go out as you wish for them to be sent out. You can use the copy function to copy message customizations, however, you will need to manually add contacts to each campaign.
I hope this helps!
Bri
Documentation Coordinator/Survey Sorceress
SurveyGizmo Customer Experience Team
— Youssef on 08/26/2016
@Bri Hilmer : Thank you for your answer, but with the actual functionalities, how can we manage to send recurrent campaigns ? What is the best practice ?
Thank you in advance
Admin
— Bri Hillmer on 08/25/2016
@Youssef: We do not currently have recurrent campaign functionality in SurveyGizmo. I think this is a great idea; I will pass this feedback along to our development team for discussion as a future improvement!
Bri Hillmer
Documentation Coordinator / Survey Sorceress
SurveyGizmo Customer Experience Team
— Youssef on 08/25/2016
Hello,
Can we schedule recurrent campaigns ?
Thank you in advance
— Tawnee on 09/16/2015
@Moriah: Hey there! Thanks for checking our documentation! You can filter your reports based off of your email campaign in any account level. Take a look at our Filtering Report data tutorial: http://help.surveygizmo.com/help/article/link/filter-report-data
This is a great option to use when wanting to streamline a report based off one campaign. I hope this was helpful. Please let us know if we can do anything else for you.!
Cheers!
As always, we are happy to be of service. Have a rocking' day!
Tawnee Torres
Your Rockabilly Rebel support hero :-)
— Moriah on 09/15/2015
Is this filtering by email campaign only available for pro-plans or higher?